
General Ideas To Keep In Mind
Click to see content:
Key Points:
Think about:
Turning:
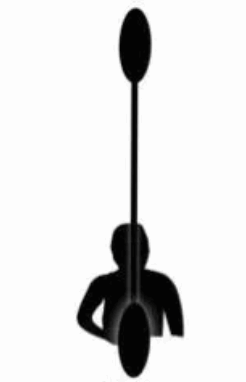
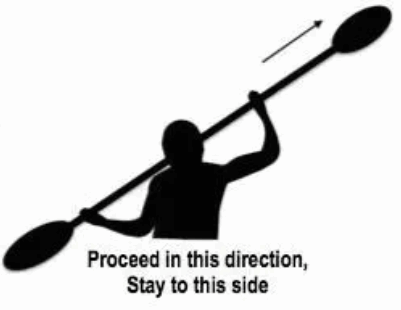
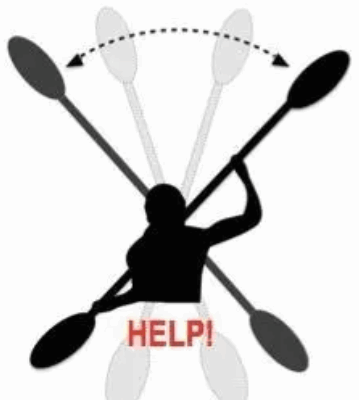
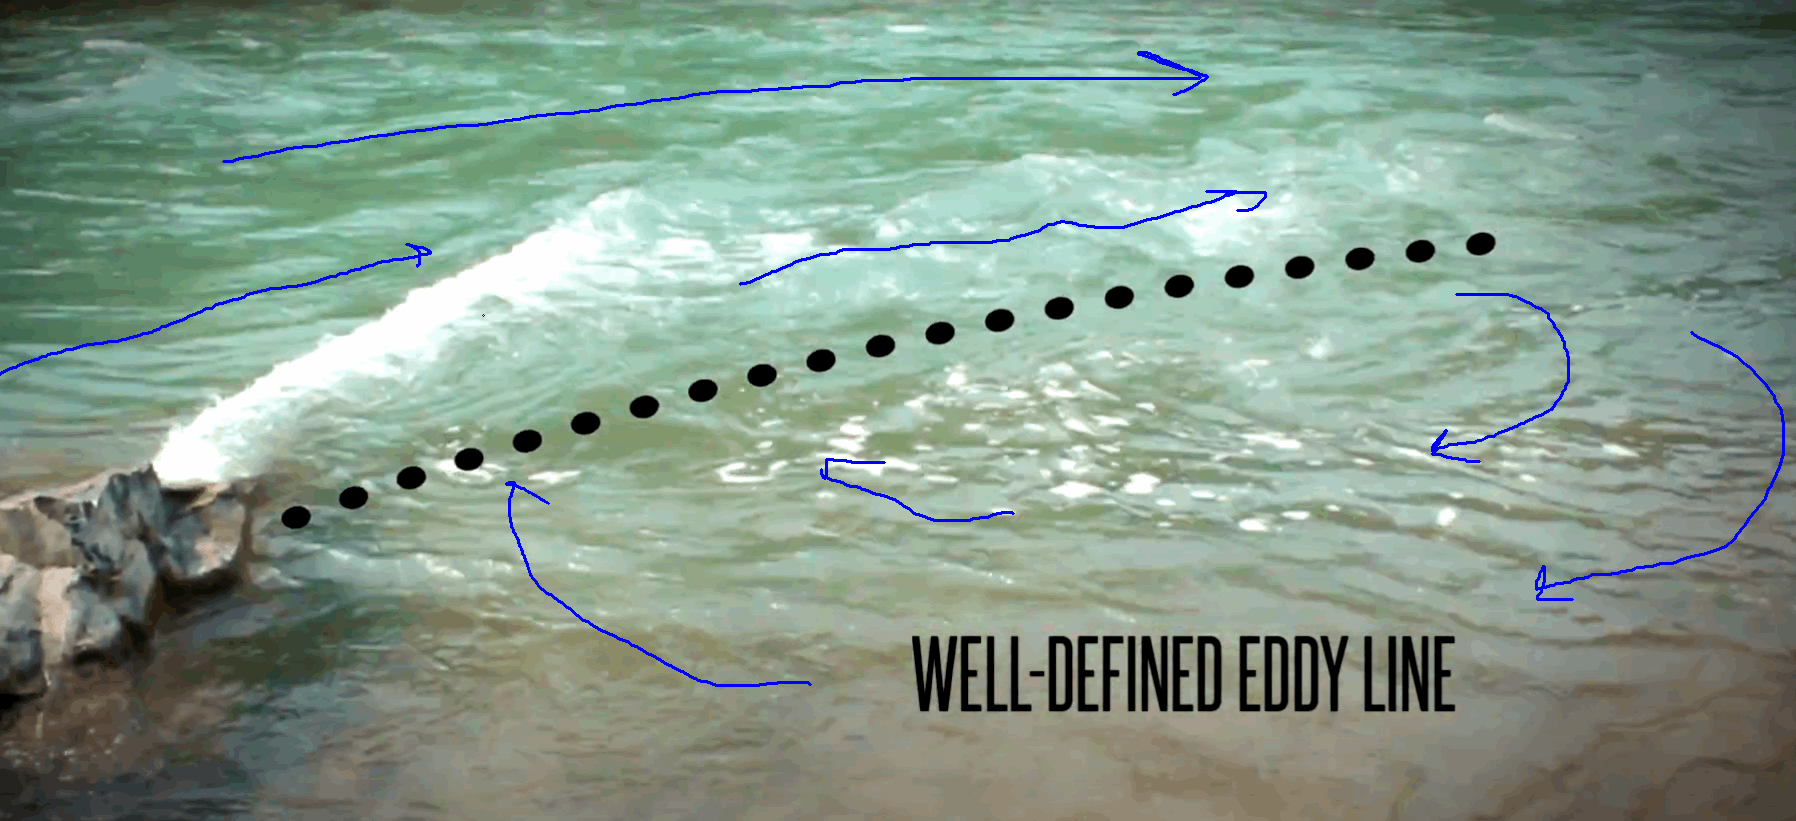
River Directions:
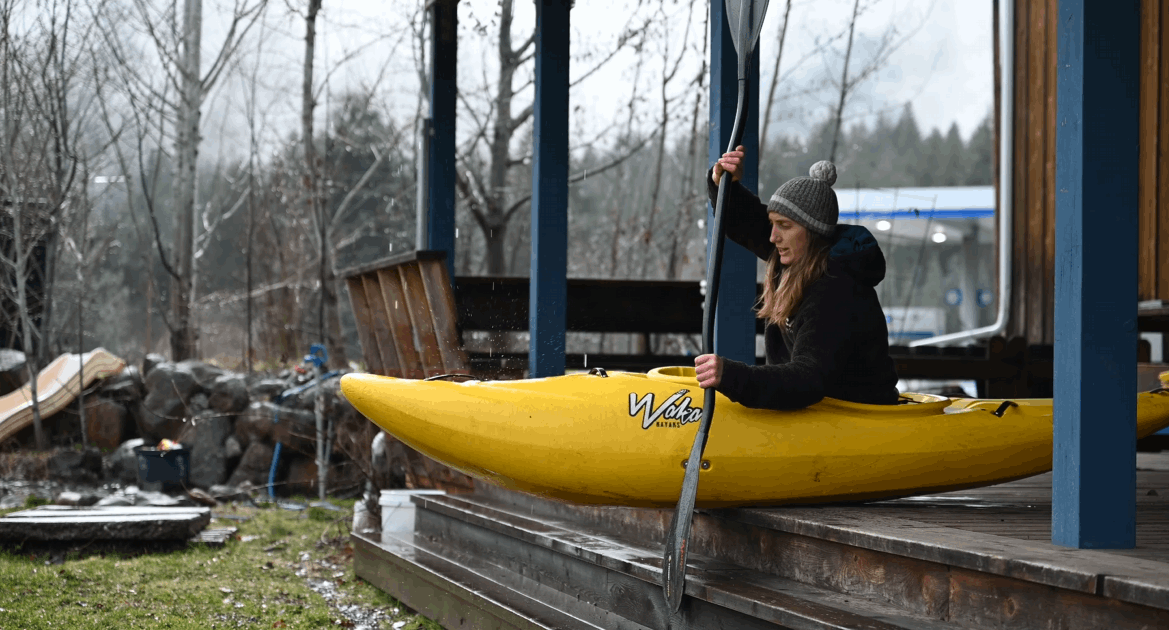
Basic Techniques
Crossing the river, facing upstream Executing a turn or change of sides when ferrying Leaving an eddy and entering the current Leaving the current and landing in the slower, recirculating water (eddy) Different types -Click to see content:
Ferrying
Key Points:
- Moderate angle (~20) deg to waterflow
- Watch seamlines
- Use stern draws/pries to keep on track - pull your tail to the paddle
- Control your edges - keep close to flat - perhaps slightly leaned downstream
Attaining / Going Up-Stream
Key Points:
- Eddy to eddy hopping
Ferry Turn
Key Points:
- When Ferrying...
- One sweep on downstream side to initiate
- Sweep torso around dynamically and look downstream to the other side - changing edging
- Use a bow draw to pull yourself around
Peel Out
Key Points:
- Get some power strokes in pointing upstream while in the eddy
- To Ferry:
	- Leave eddy with slight edging leaning downstream
	- Transition to downstream-side only strokes or continue with power strokes
	- Flatten out boat
- To head downstream:
	- Make a sweep stroke on the upstream / shore-side to initiate turn downstream right when heading over eddy line
	- Plant a draw stroke vertically and slightly behind the cockpit and use the draw to sail you where you want to go
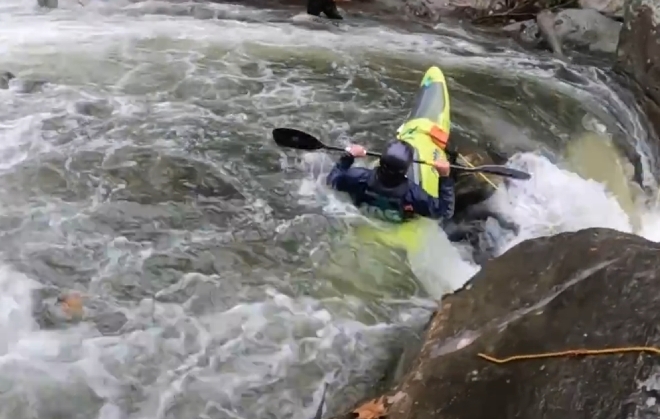
Eddy Out / Pivot Turn
Key Points:
- Look at end target
- Don't necessarily aim for uppermost portion of eddy - if recirculating eddy or waiting for others get towards rear
- Use stern draw stroke to pick-up speed
- At last second before entering -  perform sweep on downstream side to initiate
- Perform Pivot-Stroke / C-Stroke (middle draw, feather to bow draw, power stroke) when you have landed
- Don't place pivot stroke too soon (in moving water)
- Keep boat flat when pivot stroke has started so that it can glide easiest
- Lean to inside of turn
- Edge tail in to bite-in - to stop more quickly
Tighter Eddy-Outs
Less Tight Eddy-Outs
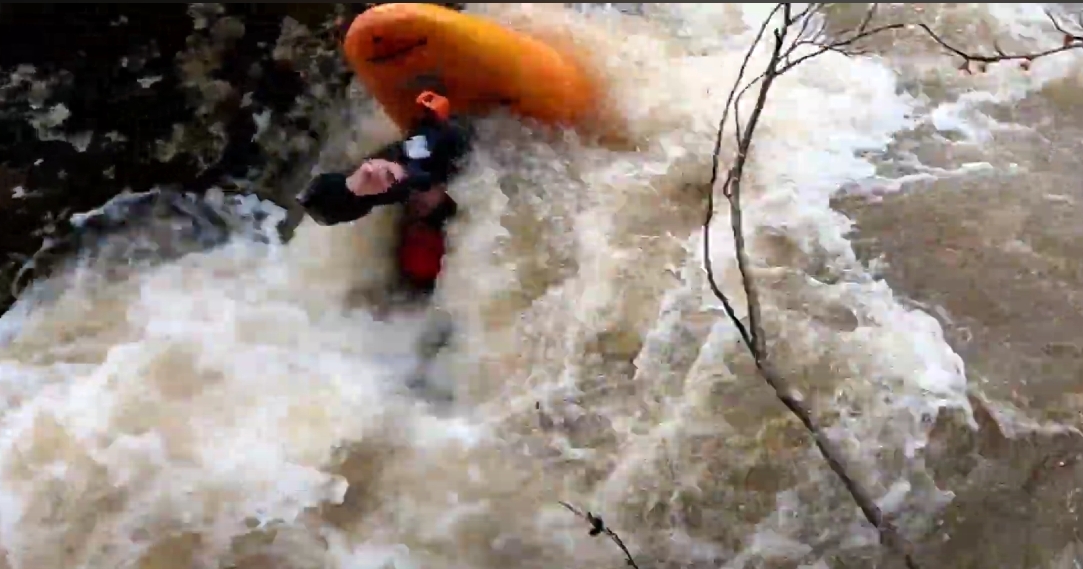
Getting out of a hole
Key Points:
- Know where you can get out - seam lines / tongue
- Patiently use pries to get there
- Keep pries / braces as low as possible to protect shoulders
- If entering hole in big water, try duck diving or turtling before hole with speed and using green water speed to get spit out.
- Performing sweep to push nose into falling water upstream can be enough to sometimes mystery move push the kayak out of the hole
- Upon flipping - many holes will push you out of the hole due to large force from water pressure on your chest/head
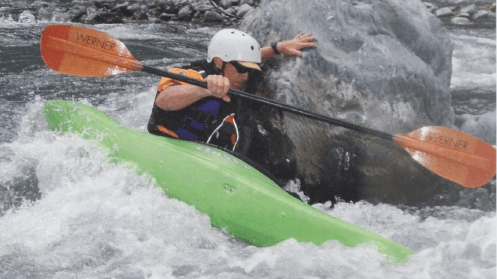
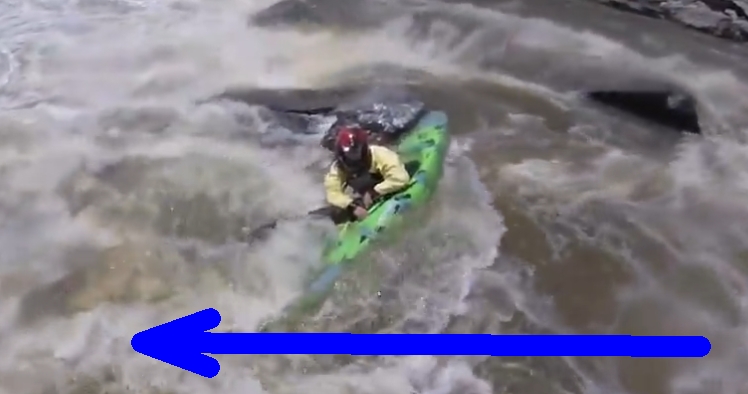
Boof
Key Points:
- Edging
	- Sitting on one butt cheek
- Stroke
	- Ab tension is critical - keep lower abs very tight
	- Dont lean forward or pull (leads to you being in back seat / losing ab tension)
	- Downstream Side Plant
	- Vertical Paddle Stroke - near hips
	- Non-power hand crosses the body completely
	- Use some follow-through but without hinging body
Basic Boof
Core of Boof - Near body plant + tensioned body
Boof Exercise on floor or in chair
Boof - Heavily edging
Boof - Landing In Power Position
Lean Boof / Ear Dip
Pivot Turn / Squirt
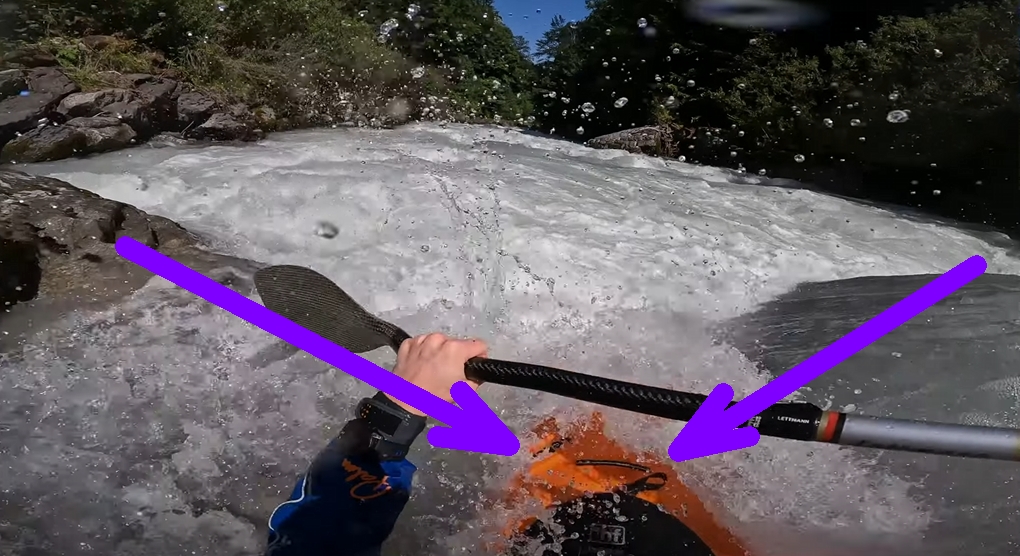
Strokes
Forward Stroke - Basic Draw Stroke - Basic Draw Stroke - Basic - Test Bow Draw for Pivot Turn Bow Draw / Slalom Pivot Turn Bow Draw / Speed Redirect
used for quick turning with relative water speed Slip Stroke - Basic T Stroke / Active Draw - Basic Sculling Draw - Basic Forward Sweep - Basic Reverse Sweep - BasicClick to see content:
Key Points:
- In flatter water, pivot point of the boat is actually where water is building up around the boat (often in the front)- the wake
- Keep hands very loose on the paddle
- For driving straight:
	- try to lean forward and use your shoulders / torso more
	- try to avoid paddling too far past mid point - this contributes to turning
	- Don't punch front hand too far at end of stroke - use more torso instead
- For turning or sweep strokes:
	- try to engage lower body for movement vs through pushing the paddle
	- stern draw
		- normally used to increase size of kayak arc in water
		- go wide with stroke
		- punch front hand over midline of boat
	- Bow draw -
		- normally used to reduce size of arc in water / to turn faster
		- used to redirect momentum
		- Don't let bow draw become hanging draw
		- Most effective if boat already has spin momentum in the desired direction
Basic Strokes
Forward Stroke
Draw Stroke
Sweep Stroke
Compound Strokes
C-Stroke
Offside C-Stroke
Reverse Compound -Stroke
Braces
Click to see content:
Key Points:
- Head down / look at the paddle
- Elbows under the paddle / except in low brace
- Arms in the box (protecting shoulders)
- Be aware of what knee you are loading - dont pull on knee across from brace
Low Brace
High Brace
Sculling Brace
Brace Correction
Braces under Water - Exercise
Sustained Brace - Exercise
Deep Brace - Exercise
Rolls
Click to see content:
Tips for a bombproof roll:

- Attempt First In Simpler Situations
- Then In Whitewater
- Modified Backdeck Roll For Shallow Situations
- Stay Low-Profile When Heading Underwater / combat roll position
- If Bracing Fails - Commit To Roll Or Sustained Brace/Deep Brace
- Importance of Feeling For Pressure of  Water on paddle blade for determining timing of Hip Snap - wait for it or feel for it in different position / side
- Hip Snap Is The Most Important Part Of The Roll - it rolls the boat
- It Isnt About Sweeping The Paddle Through The Water But Using The Paddle To Support Hip Snap
- Keep Head Low (Forward / Side / Or Back) - comes up last
- Looking At Your Paddle Until Upright and Recovered Can Help
- Learn Roll On Both Sides And From All Positions
- Use Momentum From Failed Roll Attempt to Roll Up On Other Side
- Use Floatie (without paddle) to practice hip snap (requires you to limit pressure created with upper body) - slowly use less pressure
- Rolling in a hole - try to roll up on downstream side - feel for water pressure on you / the paddle and use it to your advantage
Roll Learning Progression
- low brace
- sculling
- high brace
- fall half under water and snap out (brace)
- fall fully under water and snap out (c-c)
- do a c-c roll - going underwater in setup
- do a c-c roll - going underwater in odd positions
- fall fully under water - scull up to snap
- fall fully under water - feather up to snap
- normal backdeck
- modified backdeck
- static backdeck
- backdeck recovery (one side only)
- do complete exercises on offside
- do complete execises in different whitewater, holes, waves, etc (with low risk)
Standard Rolls
C-C Roll
Sweep Roll
Backdeck Roll
Key Points:
- Commit
- Try to kiss backdeck
- Feather blade for push
- Use pressure between hands to get push on water the whole time
- Side of face to water
Modified Backdeck Roll / Screw Roll
Hand Roll - Normal
Hand Roll - Backdeck
Further Roll Variants
C-C No-Setup
Reverse Sweep Roll
Static Backdeck
Bombproofing Roll
Roll - Exercise with Floatie
Roll - Learn Roll On Both Sides And From All Positions
Roll Tip - Use Momentum From Failed Roll Attempts - For Other Side Roll
Test Roll / Hip-snap
Further Exercises
Practicing C-C in Hole - “Window Shading”
Practicing C-C in Hole - “Window Shading” - Lose and Replace Hand
Practicing Screw Roll in Hole - “Window Shading”
Play
Entering the water with a slide / dropClick to see content:
Seal Launch
Basic Slide - Seal Launch - Seal Launch
Drop Style - Seal Launch
Key Points:
- Push with hand and paddle
- Don't lean back (Don't push too hard)
- Pull up knees
- Push off when at desired angle
- Rocker probably helps
- Check depth
Fancy Entry
Wave Surf Technique
Key Points:
- Low brace is preferable
- Pick a point to look at for reference - somewhere up stream
- Staying centered
- Edging without paddle - carving
- Don't use forward strokes to turn
- Use stern rudder-pry / turning body to initiate turn back in other direction
- Keeping top hand pretty high on pry
- Stay ahead of need to turn so you don't get flushed
- Controlling length of boat on water - long = fast
- Applying brake before we leave when carving toward one side
- Jet Ferry
- Using power position - showing bottom of boat to upstream
Carving
Wave Surfing / Carving
Wave Power Position - Carving
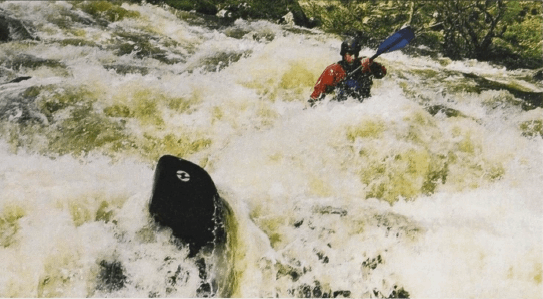
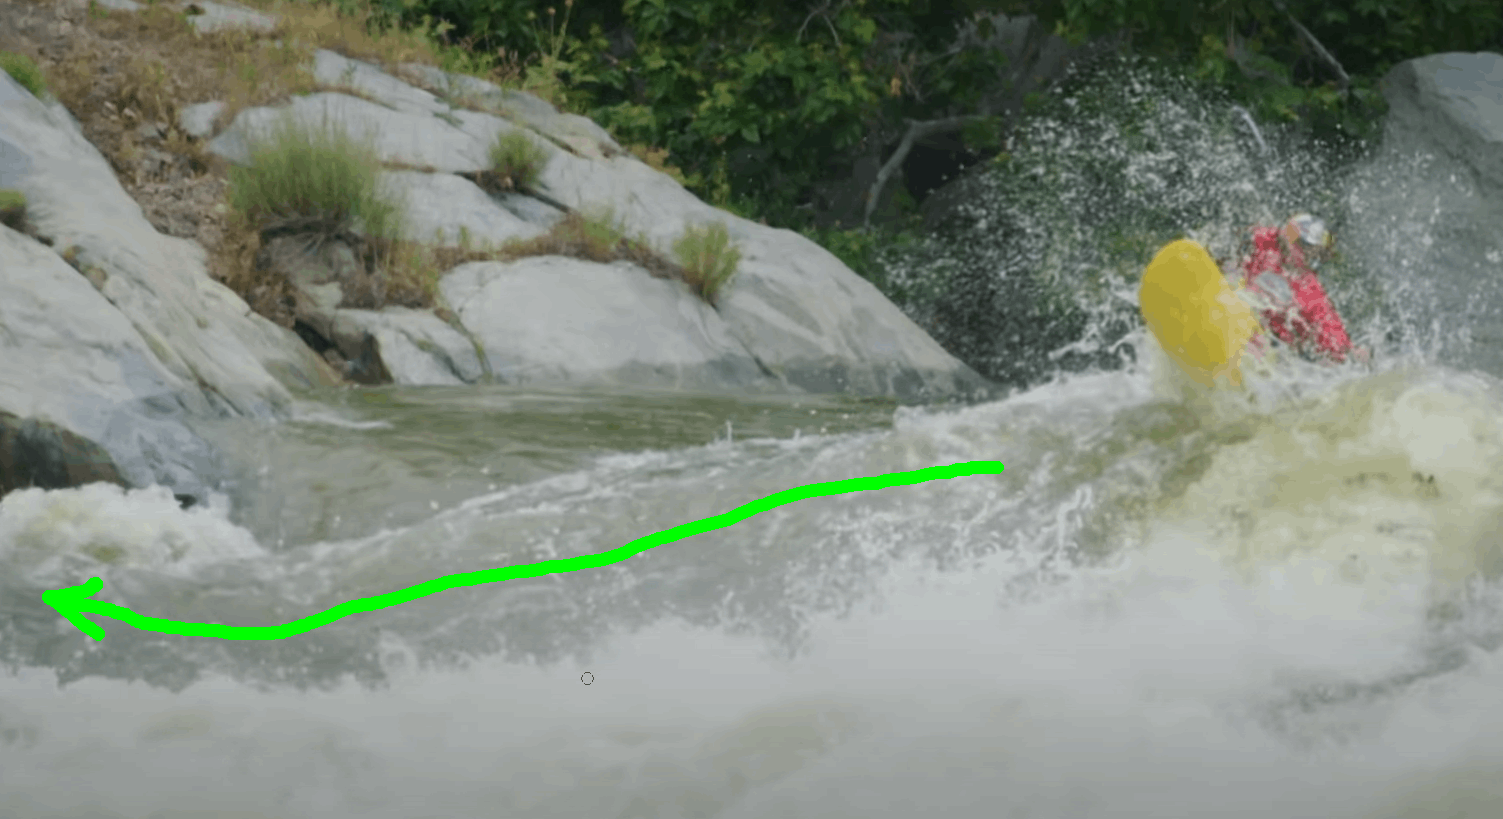
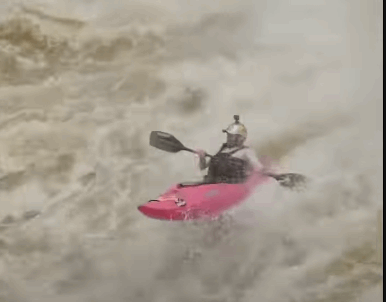
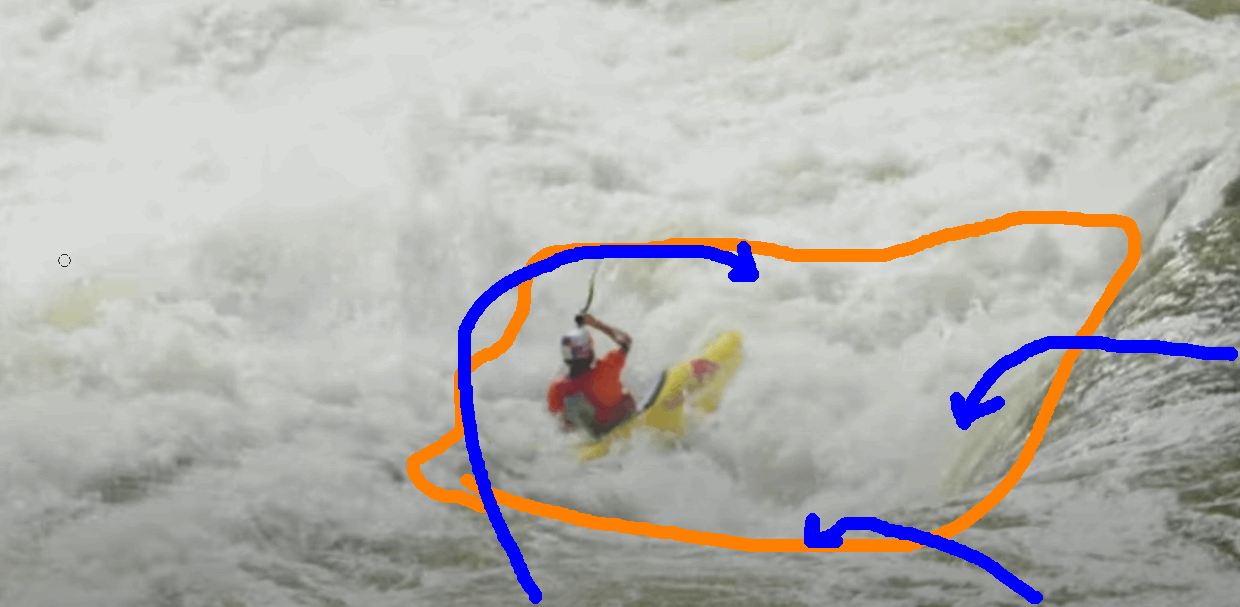
Hole Technique
Side Surf Low Bracing - Hole
Side Surf Negotiation - Forward - Hole
Side Surf Negotiation - Backward - Hole
Spin - Hole
Spin - Hole - Eyes Upstream
Double-Pump Technique
Double-Pump to Front
Double-Pump to Back
Taillee / Stern Squirt
Key Points:
- Pull knee up on opposite side of flow - to set upstream edge downwards
- Use swinging your upper body to slice under water
- Use reverse sweep / pry to push against flow
- Try not to lean back to initiate
- Be aware that your abs control the angle- tightening your abs keeps more vertical
- Use bow draws to keep going?
Safety and Rescue
It is probably worth trying this in different positions outside of water Less suggested approach - only use in class I-III max
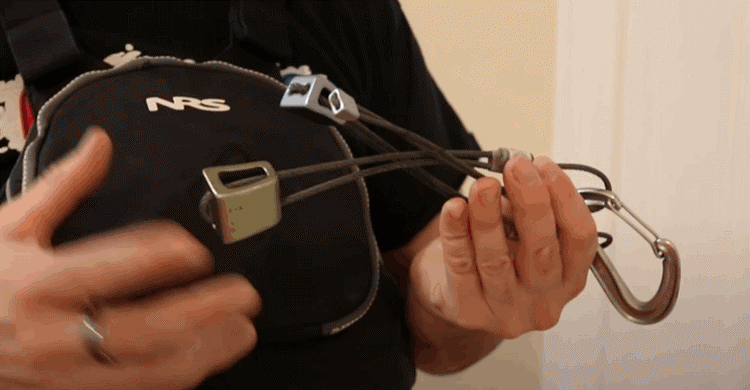
Make sure cowtail safety belt will be released Should be incredibly simple to retrieve with one hand under stress
A tethered person jumps in to save someone that is injured / unconcious Rating from 1-5 Importance of mutual support Looping small slings together for carrying
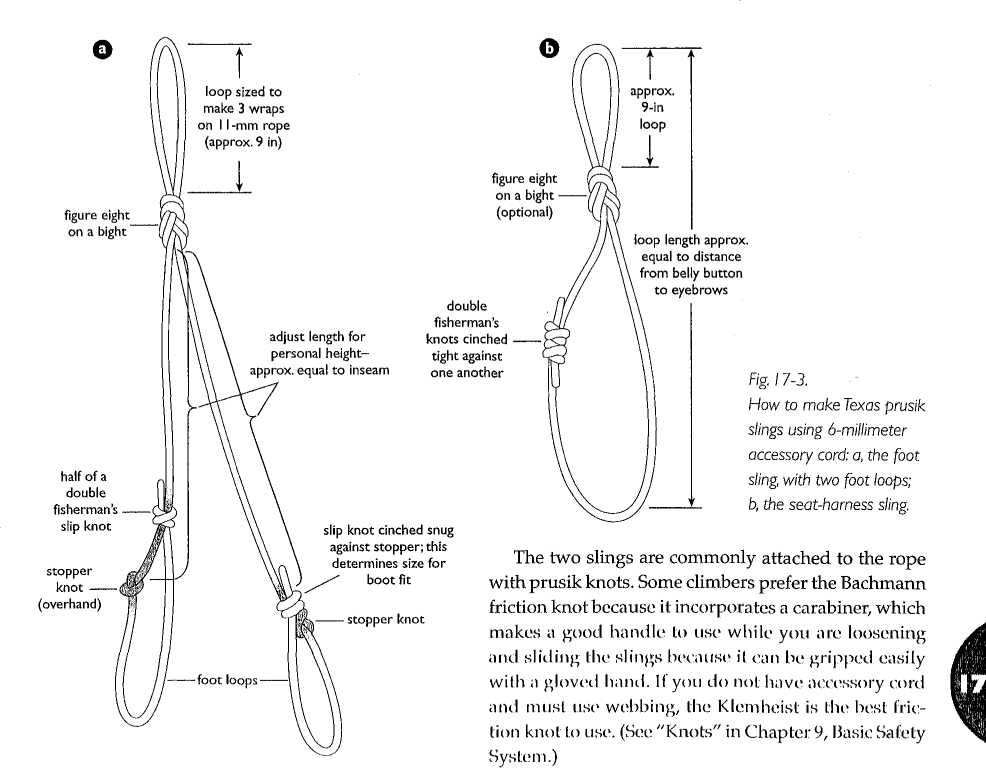
Size of prusik rope needs to be around 60% of rope used on
for making prusik loop
prusik-similar but not middle loaded/based - only 1 direction loadable
uses carabiner for friction - ease of movement
for feet or using two bands from prusik and biner
Click to see content:
Key Points:
- Avoid walking in moving water (foot entrapment)
- If you arent sure about the plan or what is going on, you can be sure you aren't the only one.  Communicate / Ask!
- Don't run rapids blind... who knows what might be there know
- Scout hazards, water flows, possible lines, plan B, where to stop
- Rating consequence - easy swim, bruises / cold swim, serious injury, risk of death, certain death.
- Order of strategies in rescue:
	- Talk, Reach, Throw. Tow, Go (TRTTG) - Go for the low risk options first.
- KISS - Keep it short and simple.
- Nothing a rescuer does should make a victim worse off.
- Person before gear - encourage people to get themselves out of danger first
- If swimmer at bottom of rapid and faced with easy swim, hang on to paddle. if at start of rapid should throw paddle towards shore and swim.
- Throw paddle if needed
- Boats can be nudged into eddys by a kayaker still in a boat
- Always wear solid shoes allowing for scrambling, helping.
- Avoiding strainers is your best best.
- Being aware of your comfort - comfort, adventure, disaster zones
- Make sure you warm up prior to serious paddling
- Bring a phone (if not in a remote region)
- Use float bags in your kayak - front and back - and ensure they are blown up
- Stay away from / upstream of your boat if swimming
- Someone have a very close call (breathe water)? Be wary of secondary drowning the next 48 hours.
- Keep rescue gear in your PFD
- If you get out of your boat to scout, bring your throw bag.
- Importance of pre-run communication on safety plan, signals, etc.
- Average person can spend 87 seconds underwater before taking an involuntary breath
- Assess risks for yourself - this translates to keeping distance to next paddler - enough to scout for yourself but to learn from their line / signals
Tough / Emergency situations to avoid
Rescue Gear
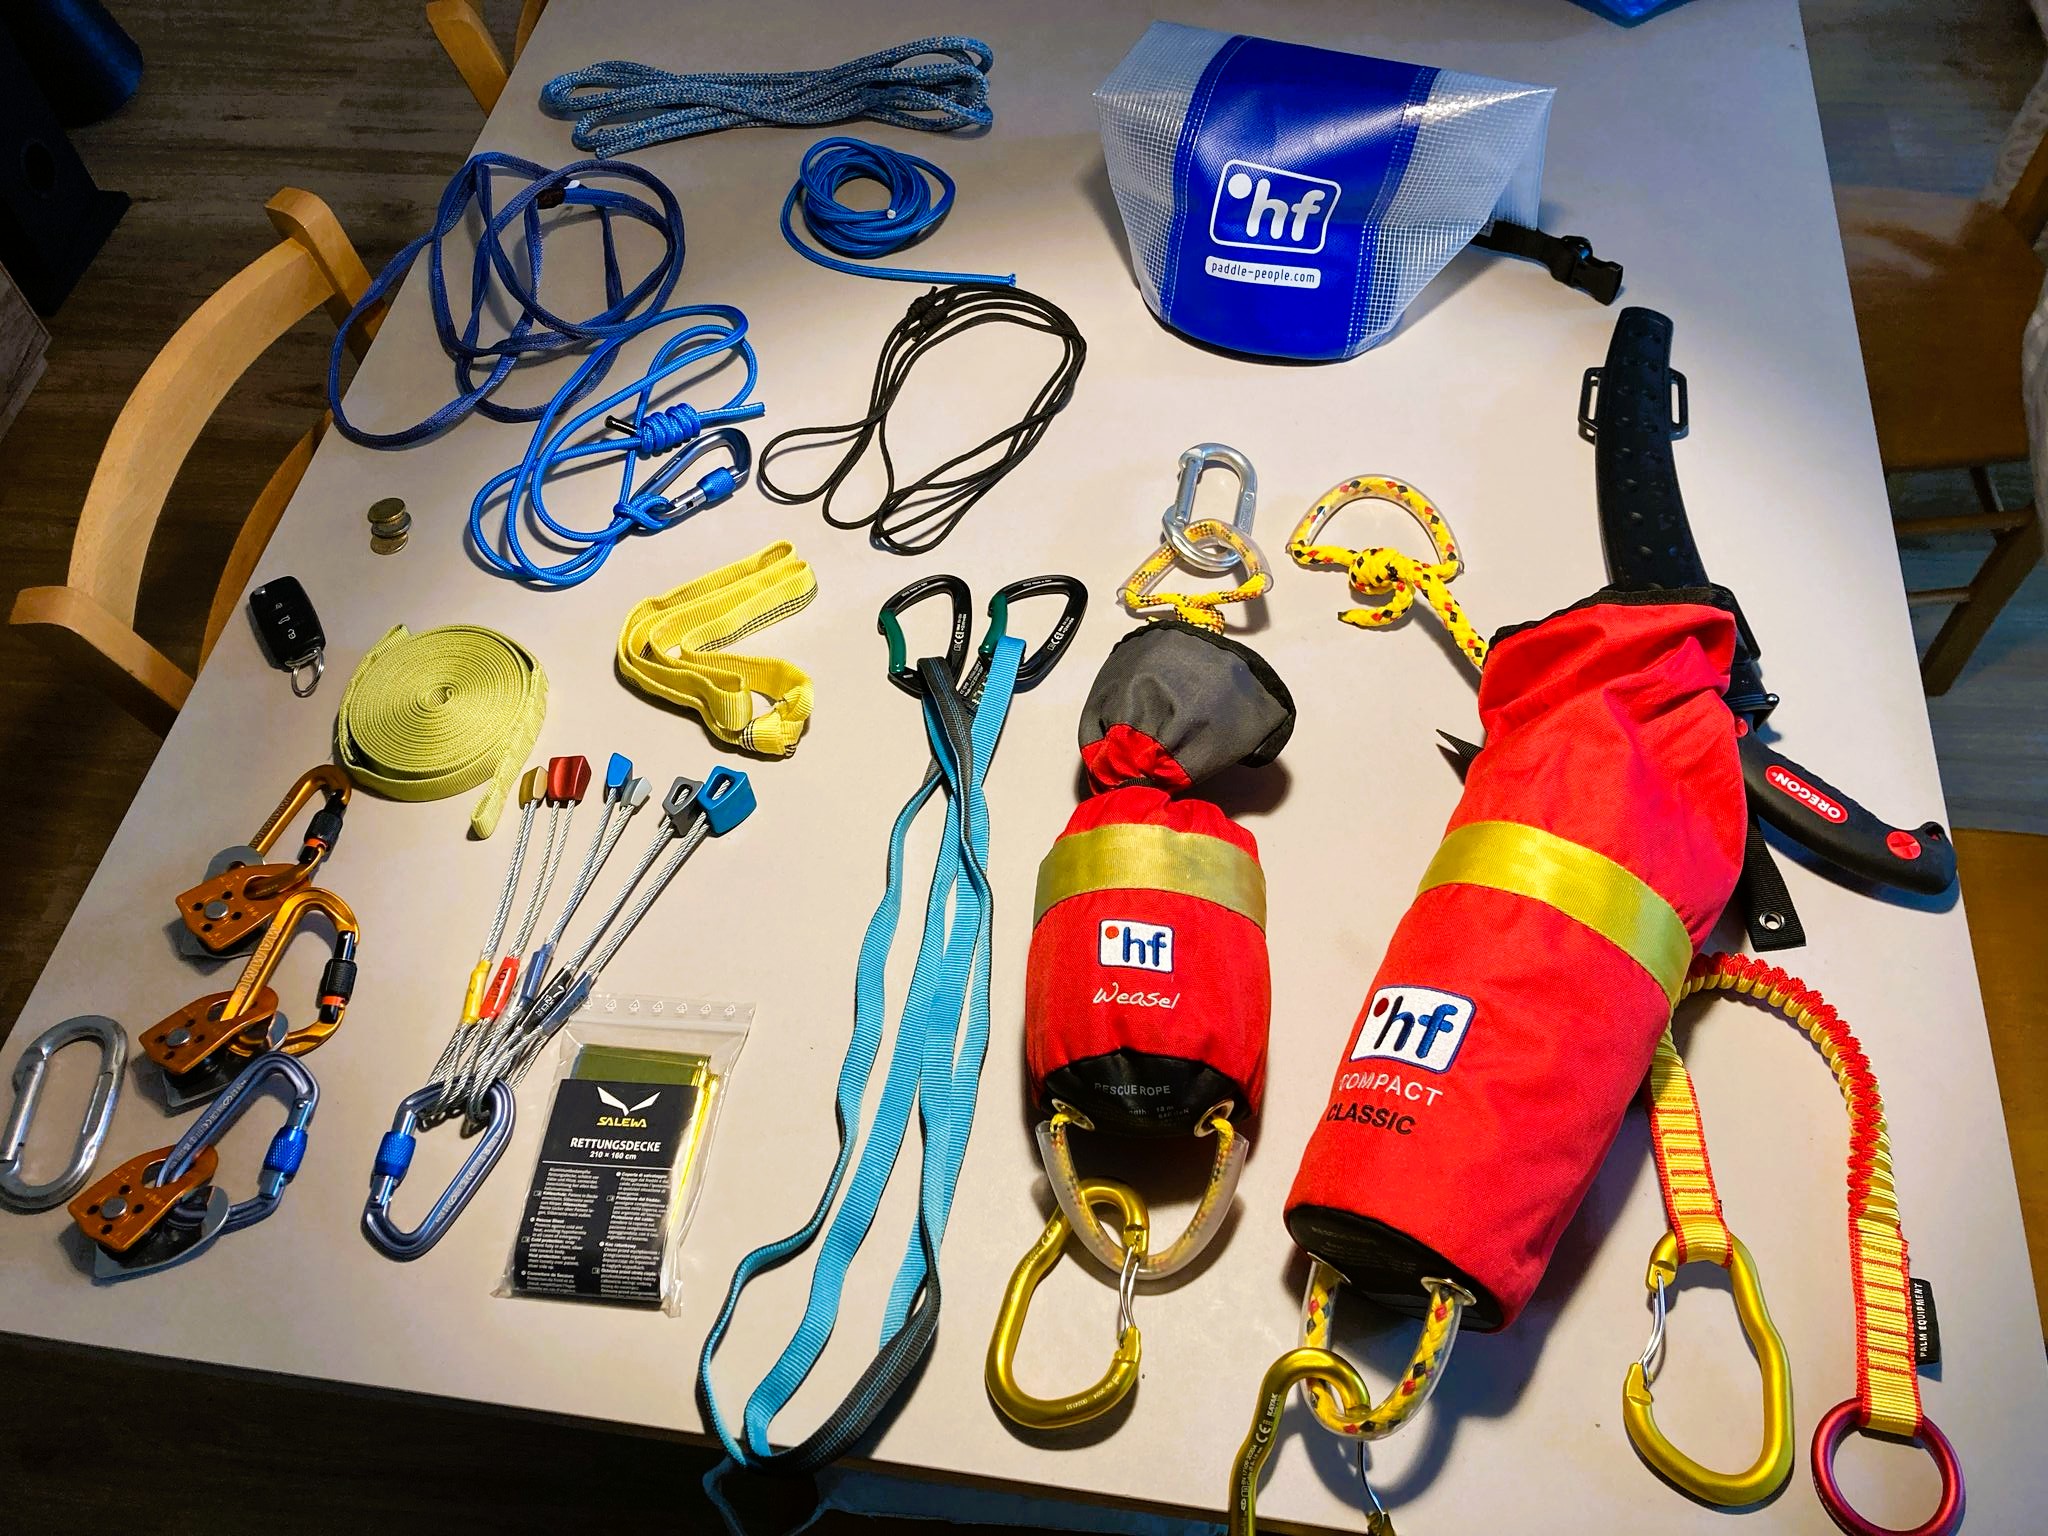 First aid kit - can put in a nalgene bottle
Principles of Safety (CLAP)
Rescue Strategies (TRTTG)
Establishing “boat safety” for Tough Sections
Preventing flush drowning
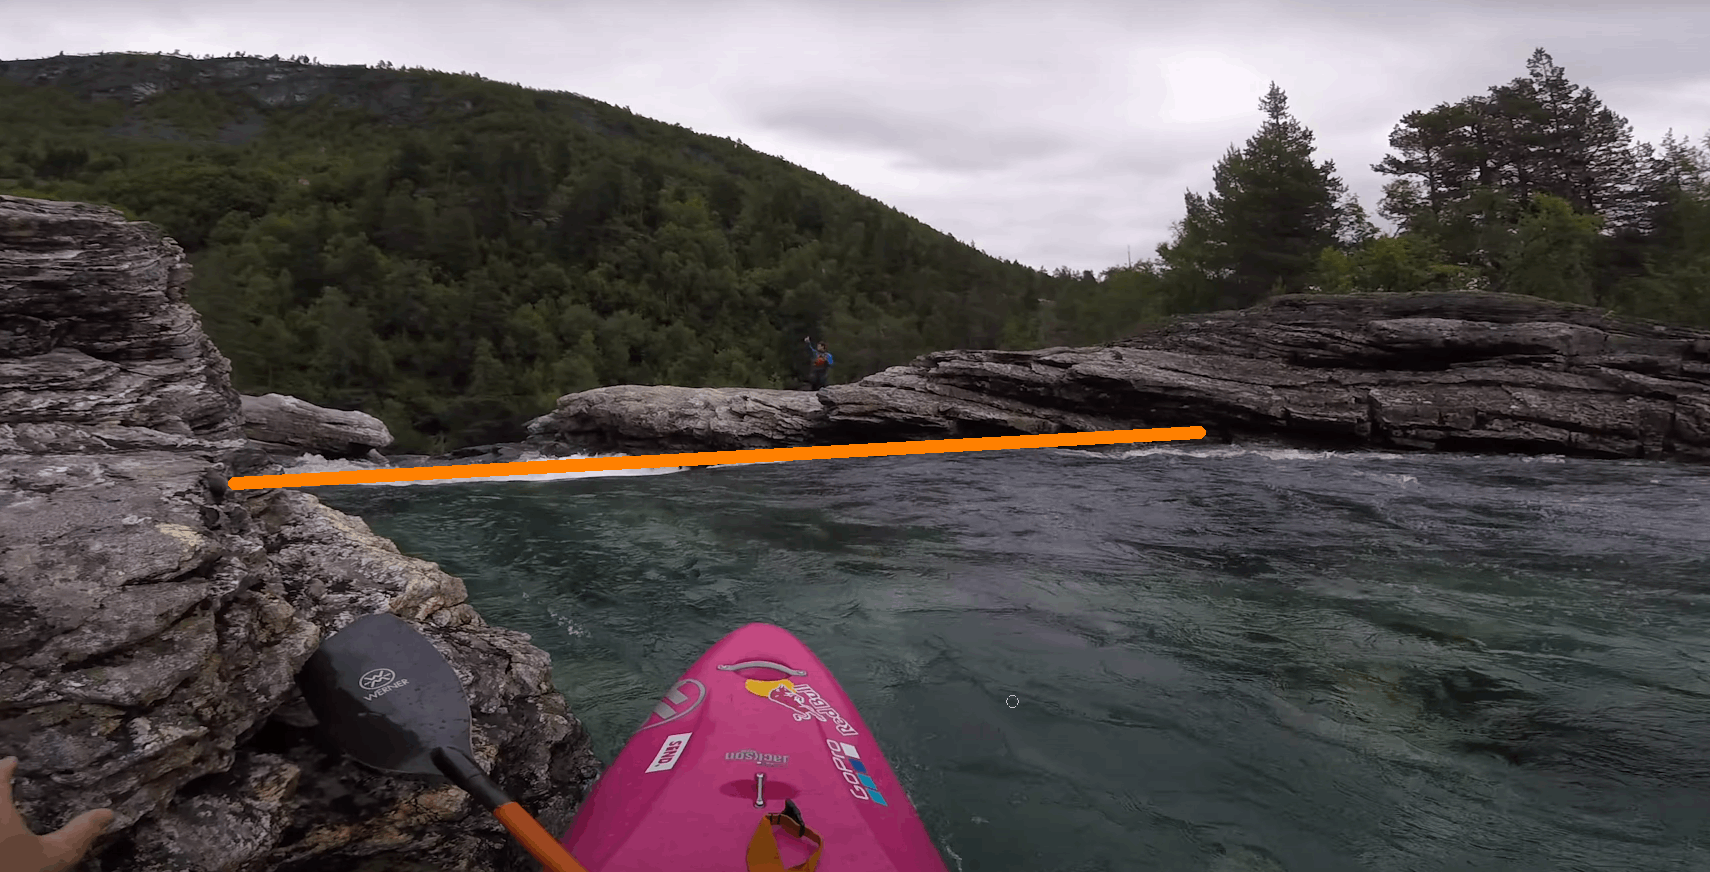
Scouting:
Getting pushed under Undercut
Self Rescue from Horizontal Broach / water-pressure pin
- "The rock is your friend" - Lean into rock / obstacle so edge isn't caught by upstream water pressure
- Extend paddle far to side for sweep stroke to generate spin to get off object.
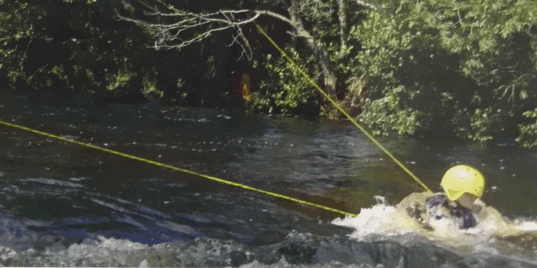
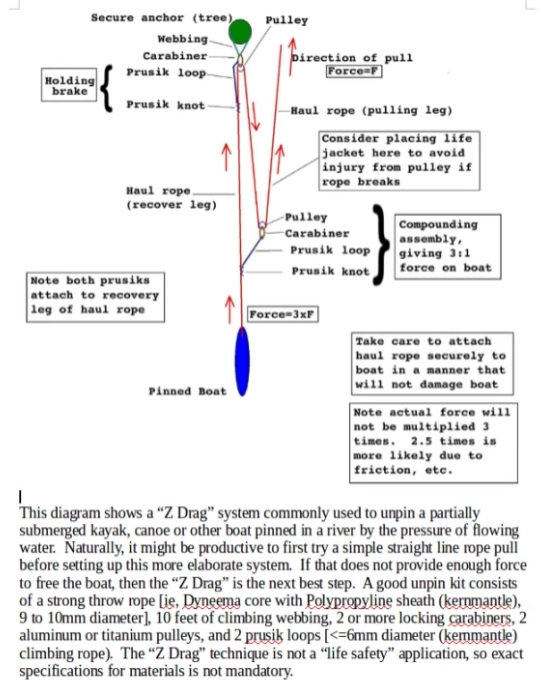
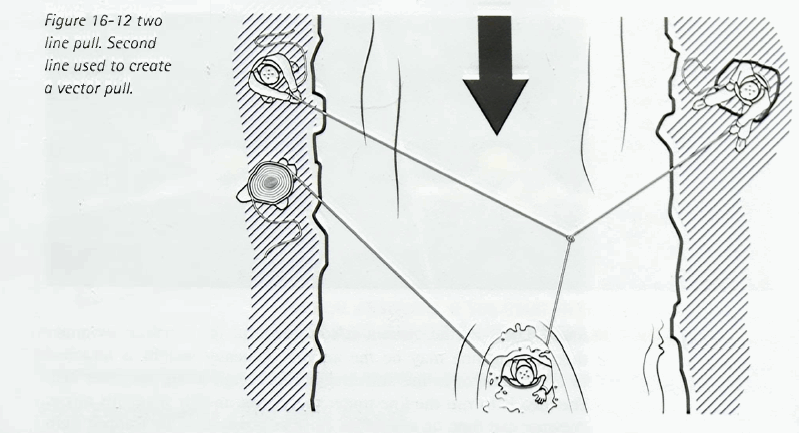
Rescuing Kayak from pinned position
- Use at least a 2 point anchor to attach a hauling line to a kayak.
- Try pulling from a few different angles and with multiple pullers before setting up a mechanical advantage system.
Vertical Pin
- Person in boat  - try to support yourself using rear boat handles
- Rescuers - try to support person above water with direct rope or parallel line across river
- If 2+ rescuers or there is a good anchor point - can use "vector pull" pulling perp to line to pull them faster - or z pull
Rescuing from Vertical Pin

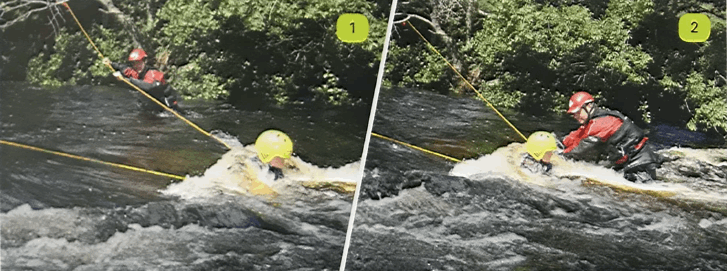
Practicing getting out of pin position
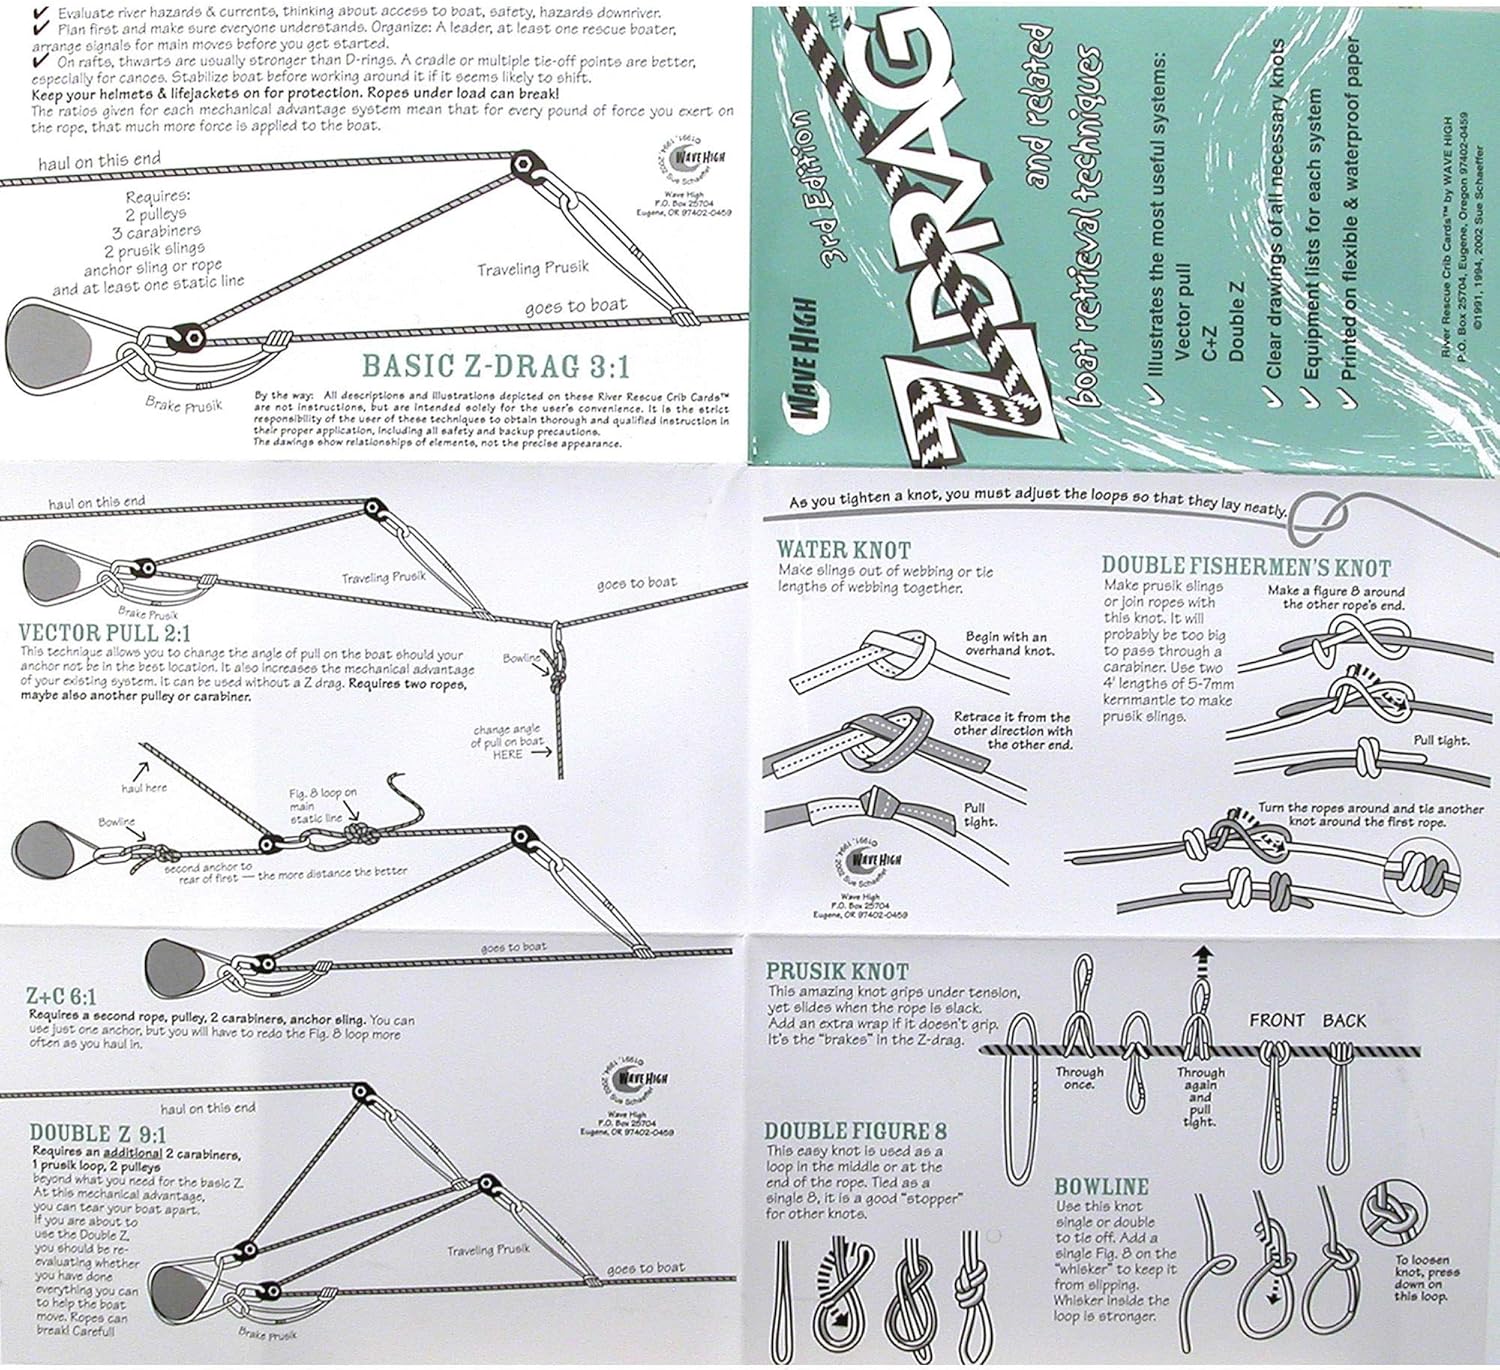
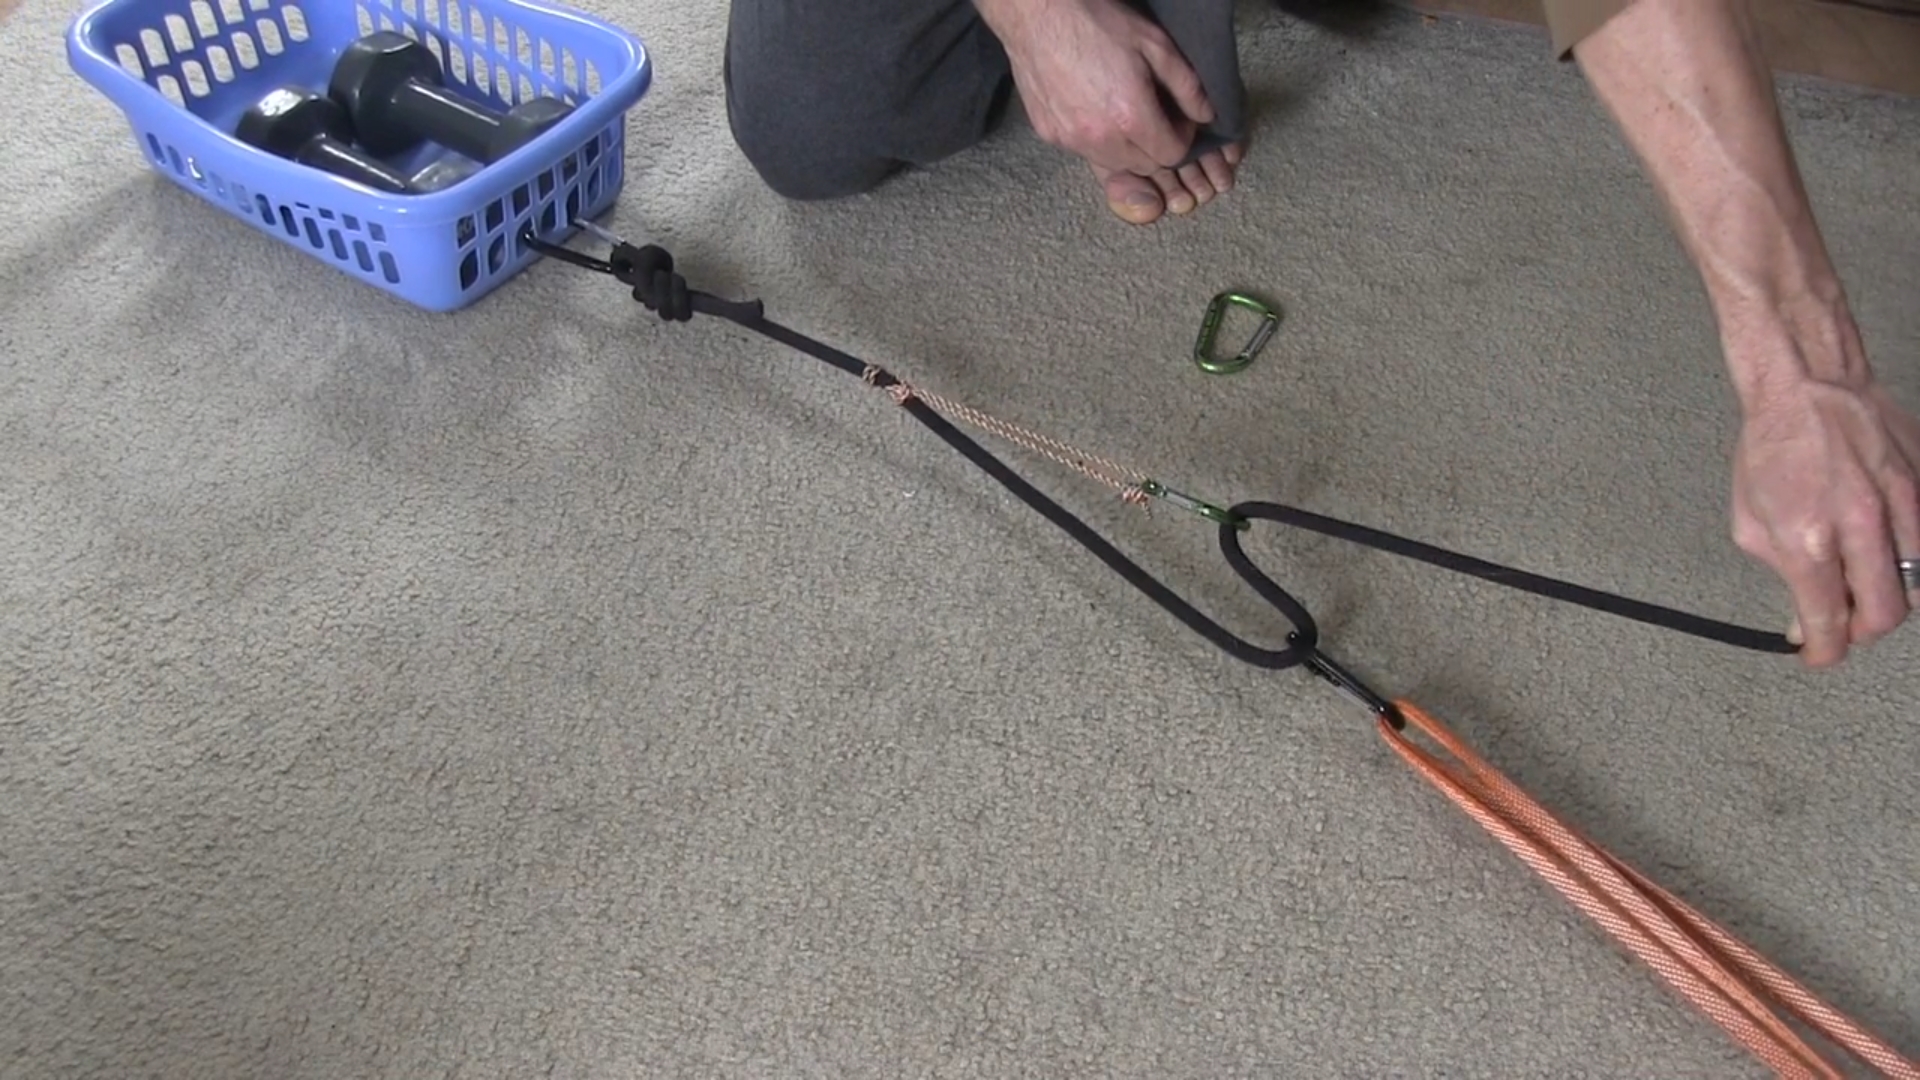
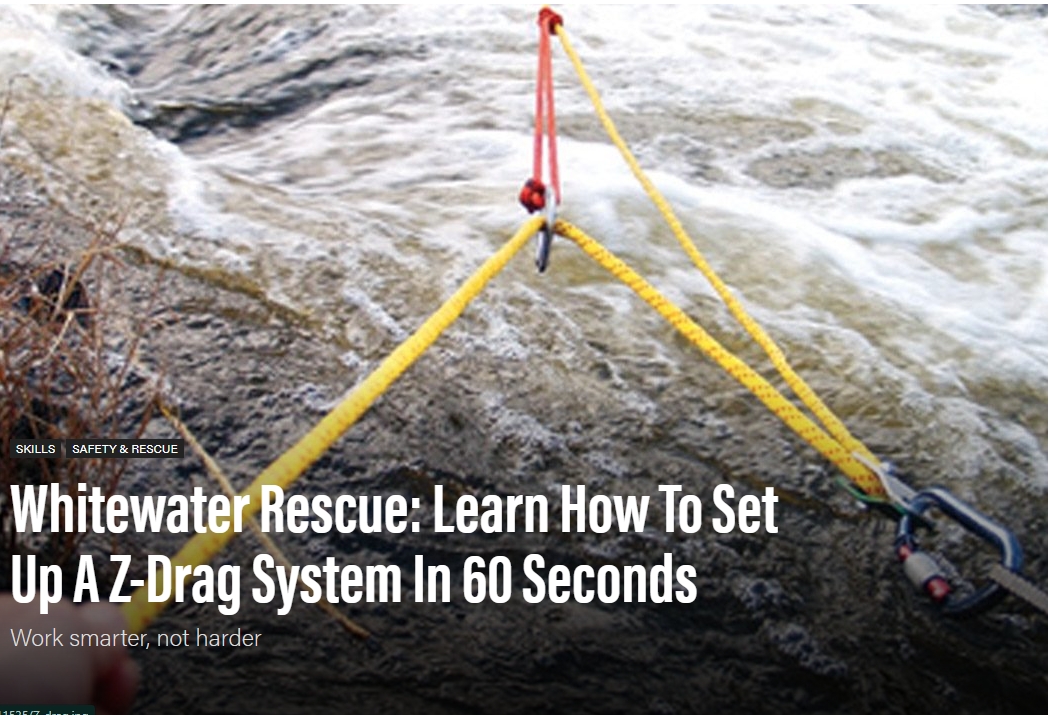
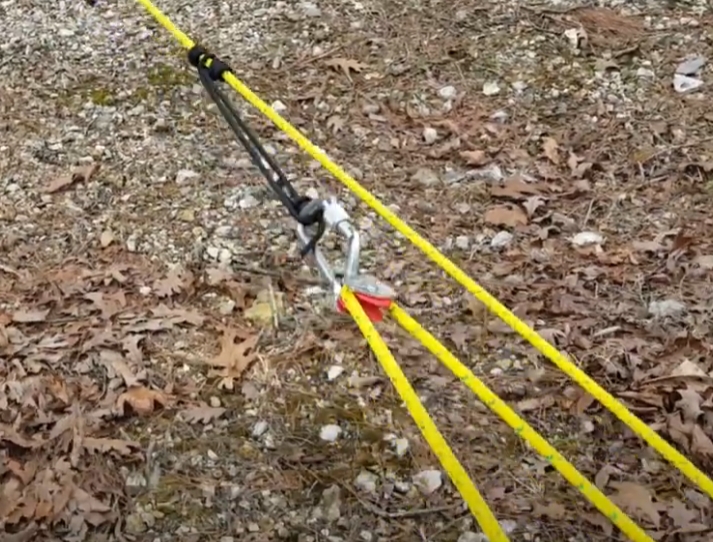
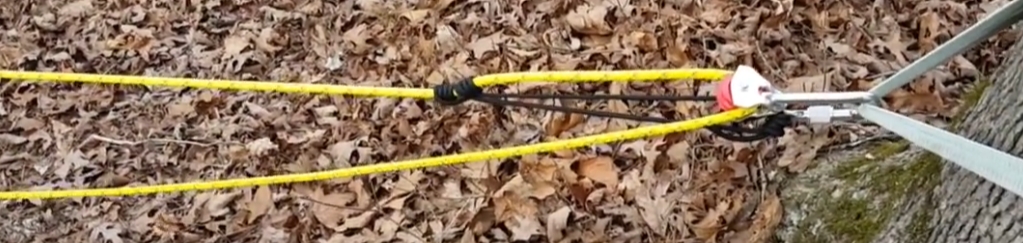
Using a Z-Drag to pull person / boat out of pin
Key Points:
- Mechanical Advantage achieved through use of Prusik on main line
- Pulleys reduce friction over using carabiners alone
- Use Prussik as brake on the main line if you need to support the person or object steadily
- To avoid injury if system breaks - add extra pulley so that you dont have your face near line under load.
Rescue of others
Rescue of person in boat
Hand of God - Rescue
Key Points:
- Attempt first in simpler situations
- Paddle alongside
- Drop your paddle in-between
- Grab them securely (leaning over their kayak)
- Pull them upright
T-Rescue
Rescuing Swimmer / Paddler
Towing Person to Safety (with boat)
- Verbally cue swimmer
- Offer back of boat and pull them through safe route to eddy / shore
Towing Boat (with Cowtail)
Throw-rope - Basic
Key Points:
- Always wear solid shoes for scrambling.
- Keep bag in front of boat with easy access and easy to unclip under stress.
- Positioning yourself - Keep in mind where they will swing to.
- cover the highest risk.
- Throw past person / slightly upsteam of them (things on surface swim faster) - dont want them to grab the sack.
- Hold rope for example with left hand, having rope wrap around your back and your right hand is holding the rope leading to the swimmer.
- Brace yourself (there is a lot of force during a swim).
Using Throw Rope From Boat
Receiving throw rope
Securing throw rope in boat

Retrieving a Paddle
Rescuing A Boat From Others
- Preferred method should be to turn over and push boat with hands or by pushing with your stern
Rescuing Your Own Boat
Deepwater Rescue / Helping to Re-enter Boat
Entrapment Rescue
Wood pin against / through skirt
Creating reaching and clipping device - mostly used for gear
 Clipping a canoe
Live Bait / Tethered Swimmer Rescue
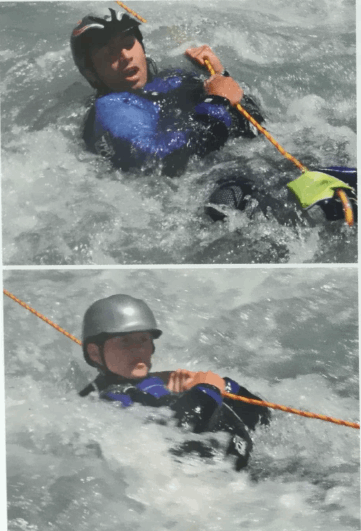
Self-Rescue
Swimming
Key Points:
- Stay Defensive if it is shallow
- Swim aggressively if deeper / pool / risk of getting hit by rocks lower
- Curl into ball to sink deeper if dropping into a big wave / hole with big foam pile
Aggressive Swimming

Defensive Swimming
Swimming - Log Roll into Eddies
Identifying your risk factor limit
Assessing Risk
Assessing Probability of Risk
Multiply risk by probability (R x P = Risk Factor)
Rating Mental Comfort
Medical
Warming up before paddling to prevent injury
Infections from Water
CPR
Stabilizing skeletal injuries
Open wounds
Head Injuries / Concussions
Shoulder Dislocations
Finger Dislocations
Groups
Key Points
- Discussing Roles
- Discussing available safety gear
- Discussing group control / order
'I’m feeling a little off form today; I’d feel a whole lot better if we used {some group control / safety technique}.'
- Discussing signals / possible scenarios
	'Hey, just so there is no confusion, what signals will we use?'
Group Control
Group Roles
Rope Work
Creating an anchor for rope work
Carrying some climbing nuts
taping rope ends
Sling
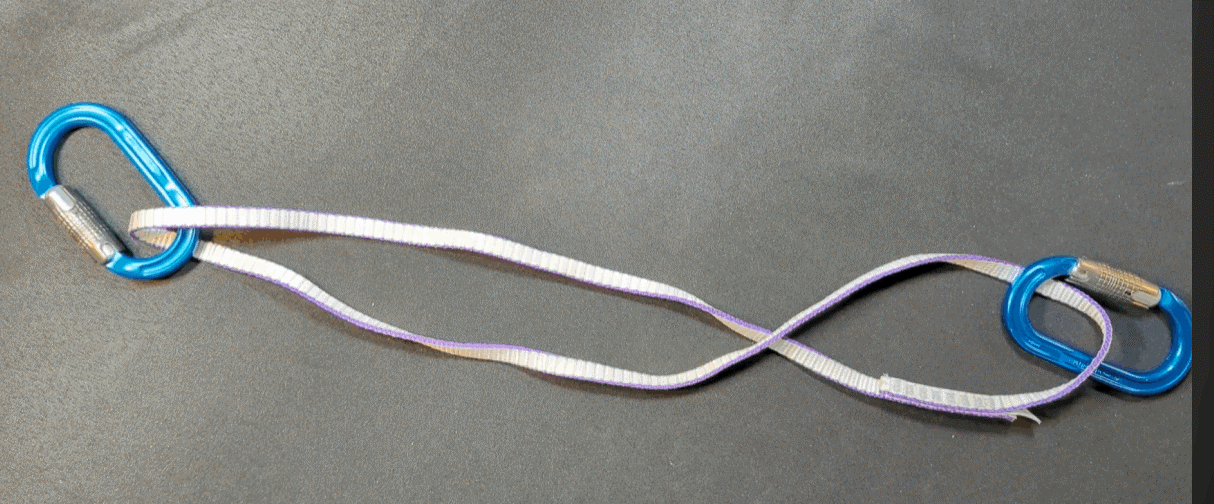
Tip - changing length of sling with knot, moving carabiner
Shortening Sling
Carrying slings
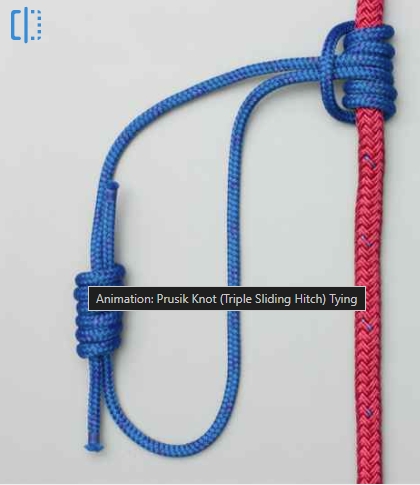
normal prusik
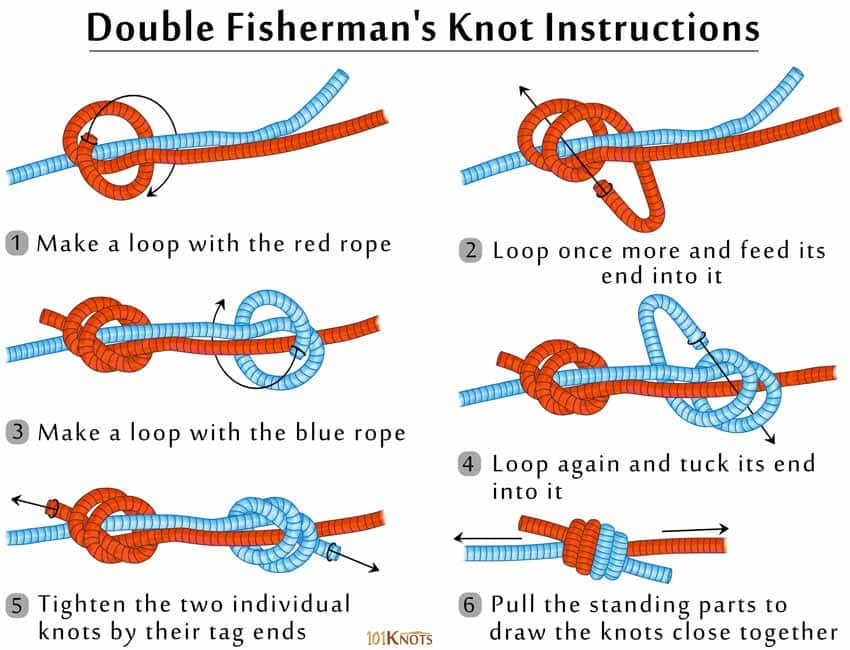
double fishermans knot (for making prusiks, etc)
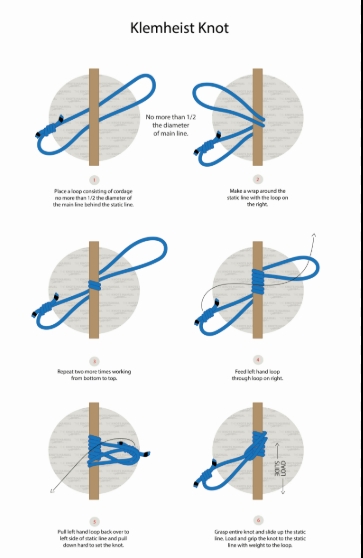
klemheist / machard knot
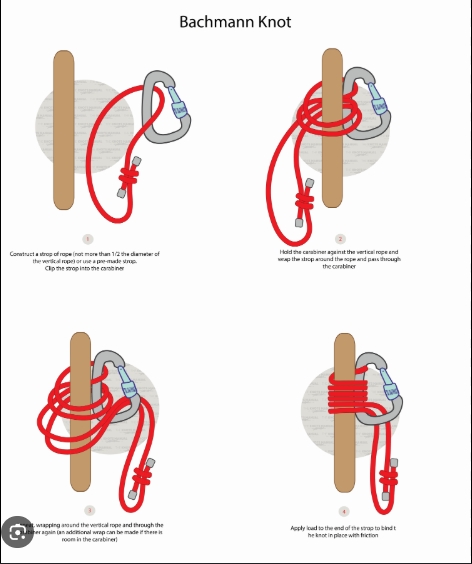
bachmann knot
Climbing out using Prusik knots
Key Points
- using blake
- using prusiks
- using texas prusik
- improvised harness
- Use spectra-based throw bags to ensure load rating high enough
texas prusik
Navigation / Signals
Click to see content:
Signals
Ok! / Are you Ok?
Stop - Flat Paddle
Eddy Out - Circle In The Air And Point Towards Eddy Possibility
Go Ahead - Straight Up
Go That Way - Always Point To Best Line
Warning / Help - Swinging Paddle Back And Forth
Stop / Hold / Enter next Eddy

Stop and Scout
Stop and Portage
Whistle Signals
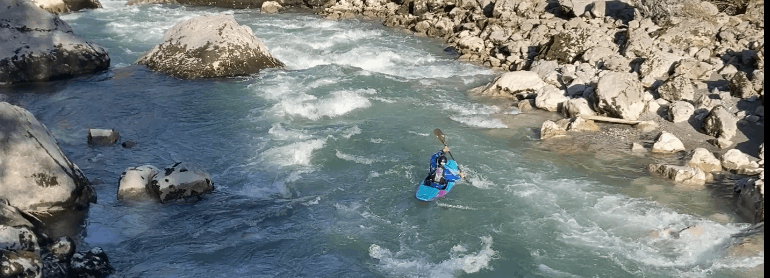
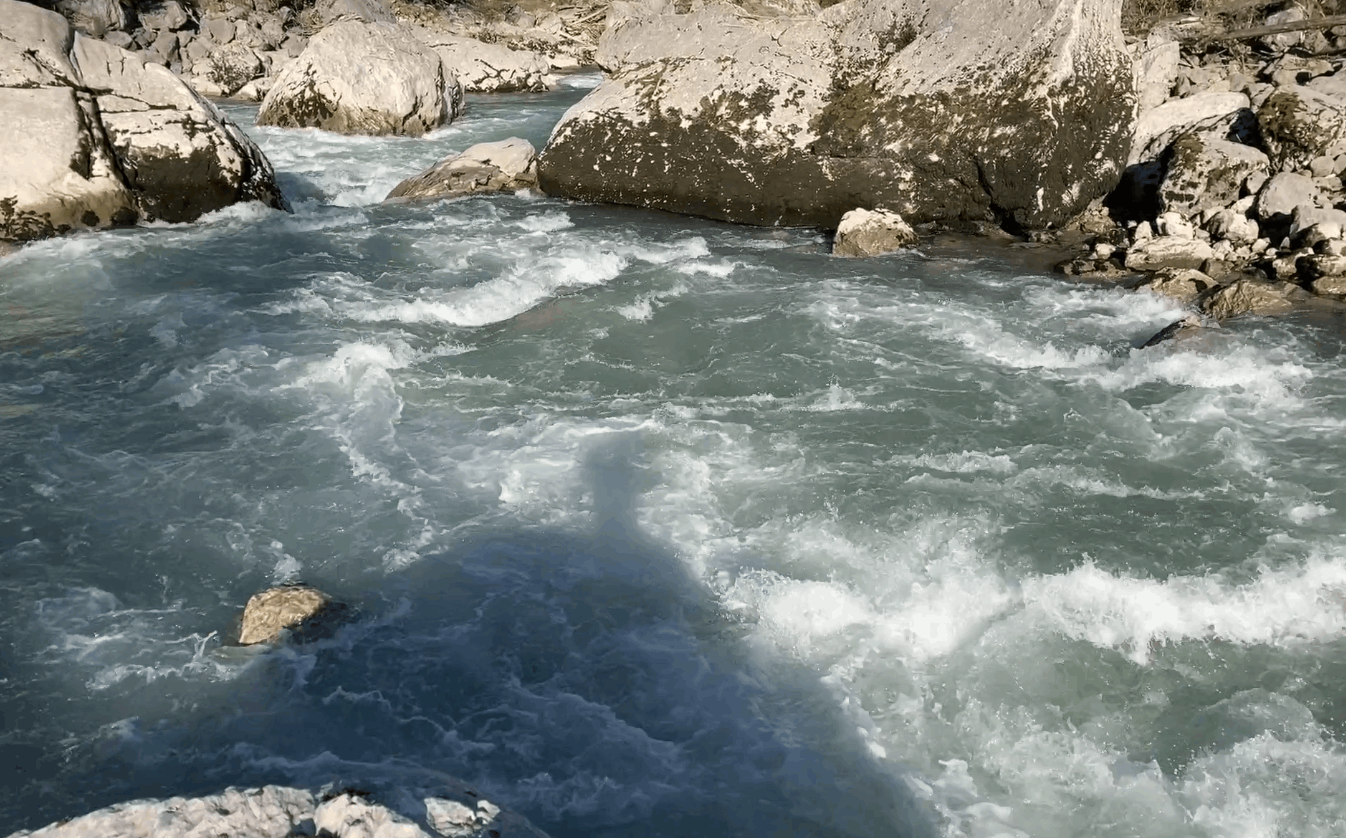
Water Reading / Hydrology
No Recirculation Or Aerated Water Smiling pour-over - use seams to escape
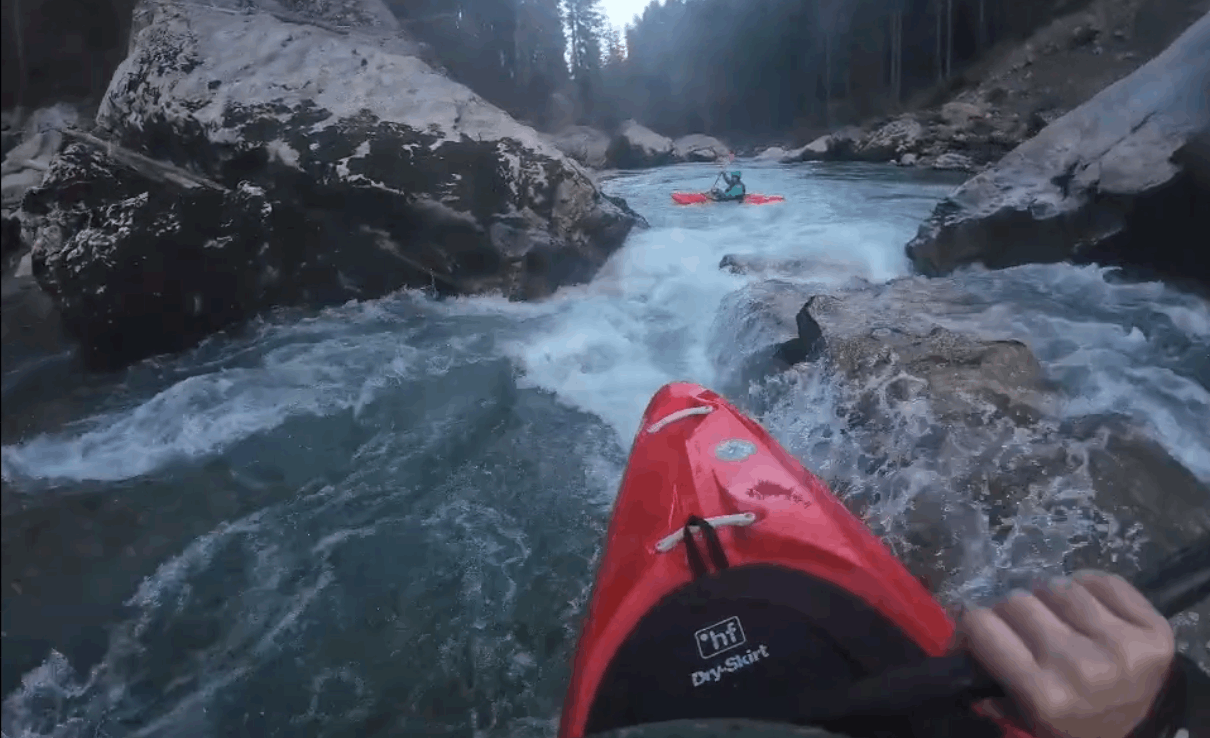
Gorge
Variation in flow
Daily variation
Flash-flood varition
Flood variation Categorizing dropsClick to see content:
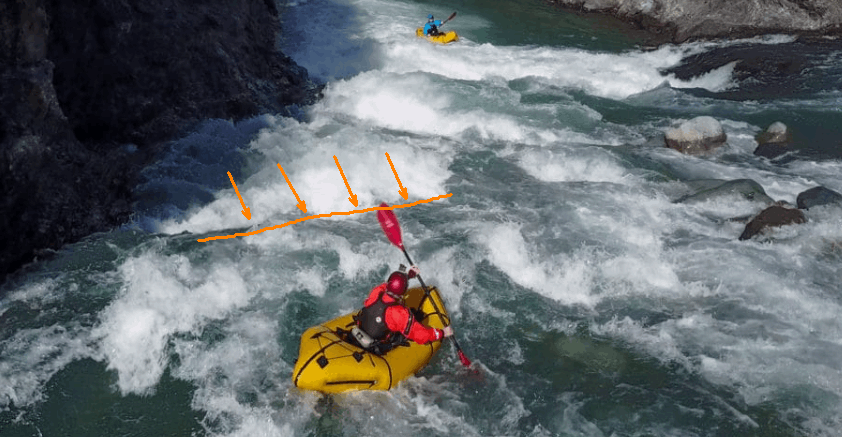
Green Water / Tongue / Downstream V
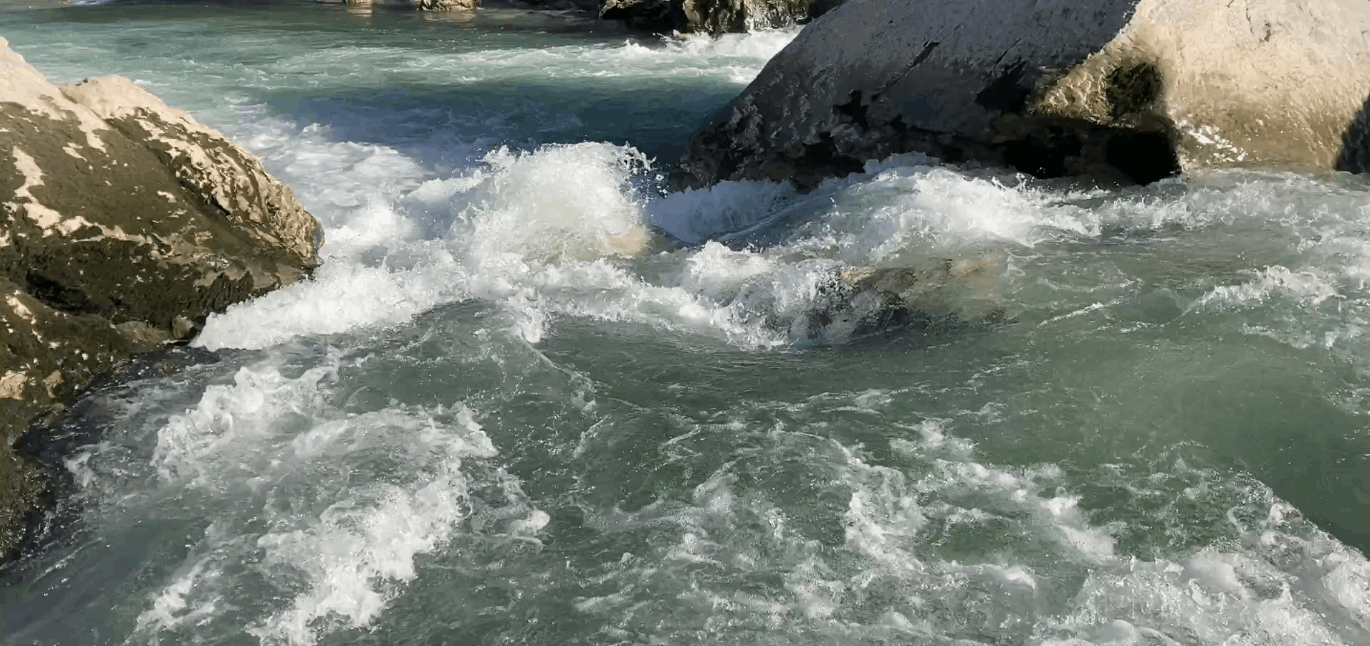
Waves
Surface Stopper - Breaking Wave
Pillows - Where Water Builds Up On Front Side
Siphon
Strainer / Sieves - Underneath Rocks / Fallen Trees


Boulder choke / Slot
Rock-Slide
Boulder Garden
Pool Drop
High Volume
Downstream V - Easier To Leave
Upstream V - Harder To Leave - Because You Cant Reach The “Corner”
Horizon Line
Hole / Stopper / Reversal / Hydraulic
Pourover / Deep Recirculating Stopper / Keeper - These Are The More Dangerous Holes

Foampile
Aeration
Boilline
Roostertail / Kicker
Wave train
Recirculation
Stay Away From Holes Where Vertical Drop Reaches Bottom Of River (This Is A True Washing Machine)
Corners (The Sides Of The Hole)
	Smiley
	Frowny
	Diagonal
If Hole Is Powerful Enough - Bodily Injury - Difficult To Control Breathing
Double-Holes - Undercut On Backside
 Frowning pour-over - beware that this form is difficult to escape

Reactionary - Sides Of Downstream V-S - Pushes Boat Laterally
Eddies

High Gradient
Low Gradient
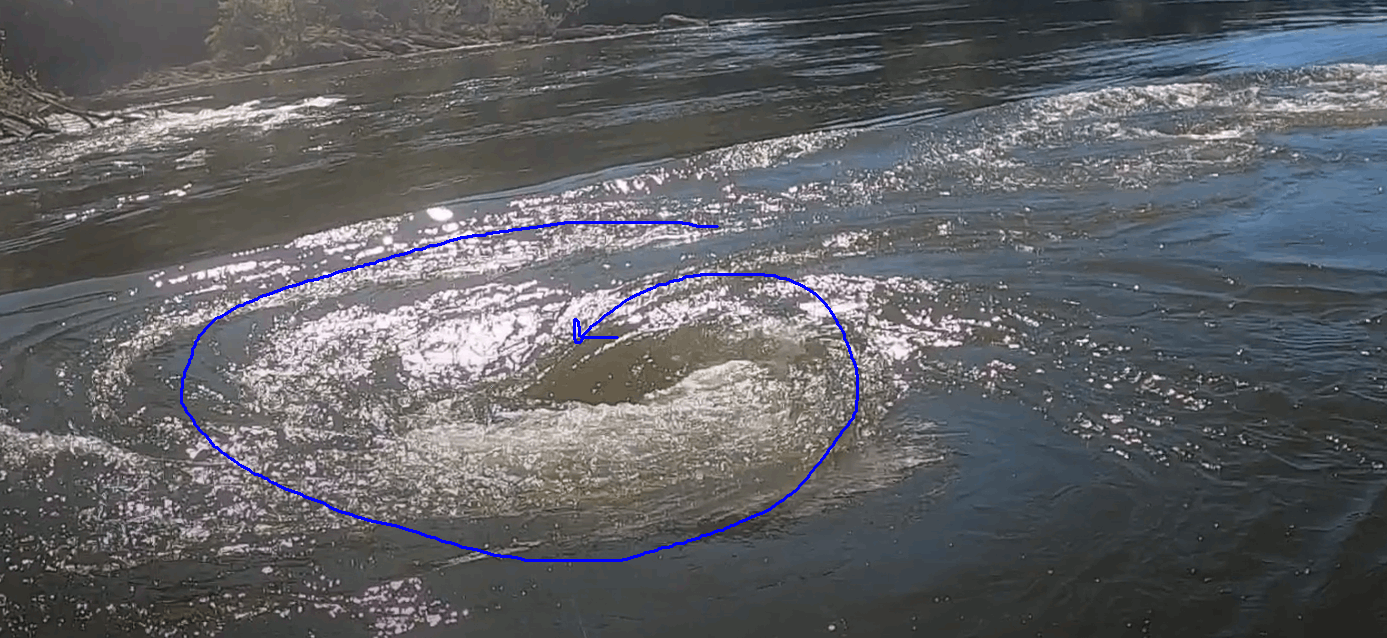
Boils

Whirlpool
Undercut - If There Is No Pillow In A Bend Or At A Rock It Is Undercut

Gear and Outfitting
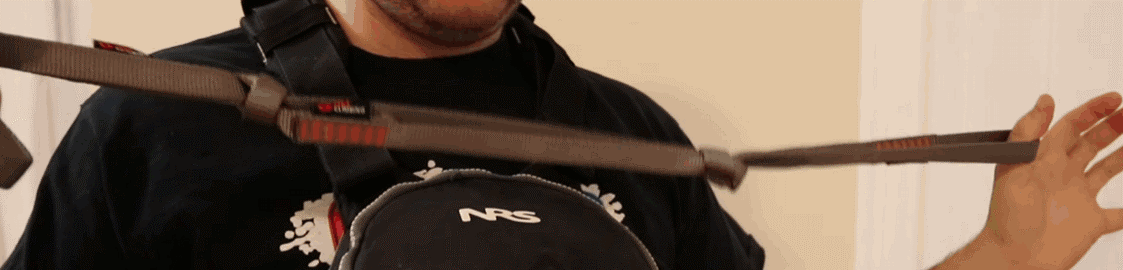
Wallet / insurance card Kayak Sponge Paddle Spray Skirt Throw Rope PFD Helmet - slightly larger for balaclava to fit under Nose clamp Water earplugs Knife Waterproof phone cover Waterproof car key / cover Appropriate attire for temperature: Sturdy shoes Hot Water bottle with d-ring Safety sling / carabiners Float bags Dry bag containing: Poncho for changing Floor mat for changing into dry suit on Charged go-pro and mount For car shuttling: For afterwards: Bring some tools with : Emergency blankets Food First Aid kit Duct tape Split paddle Sleeping pad 2 lighters Knife / axe / machete Drone for scouting Un-Pin Kit Bug Spray / bug mesh Printed / Laminated Map with landmarks identified Put duct tape on the middle of your paddle to protect paddle and/or for emergencies pe minicell foam - 32kg/m3 density minicell pe - 2pout/ft3, Wasserabsorbtion nach 28 Tagen in Wasser eingelagert 1 Vol. % Rough up with sandpaper
coat both sides,
let dry 10-15 minutes,
warm with a hair dryer and stick.
double coat if you want a bomber job.
let the first coat dry for a while (1/2 hour or more).
dangerous fumes and hard to clean up.
wear latex gloves and respirator (or work in ventilation) Cut and shape to fit any need! use a hack saw blade, dry wall saw, or band saw to cut. fine tune shape with a hand planer?. a router can be used to carve relief slots. glue with em 89 adhesive-sealant, alternatively use dap weldwood contact cement for pads, lexel for bulkheads, as well as 3m 5200 adhesive sealant.
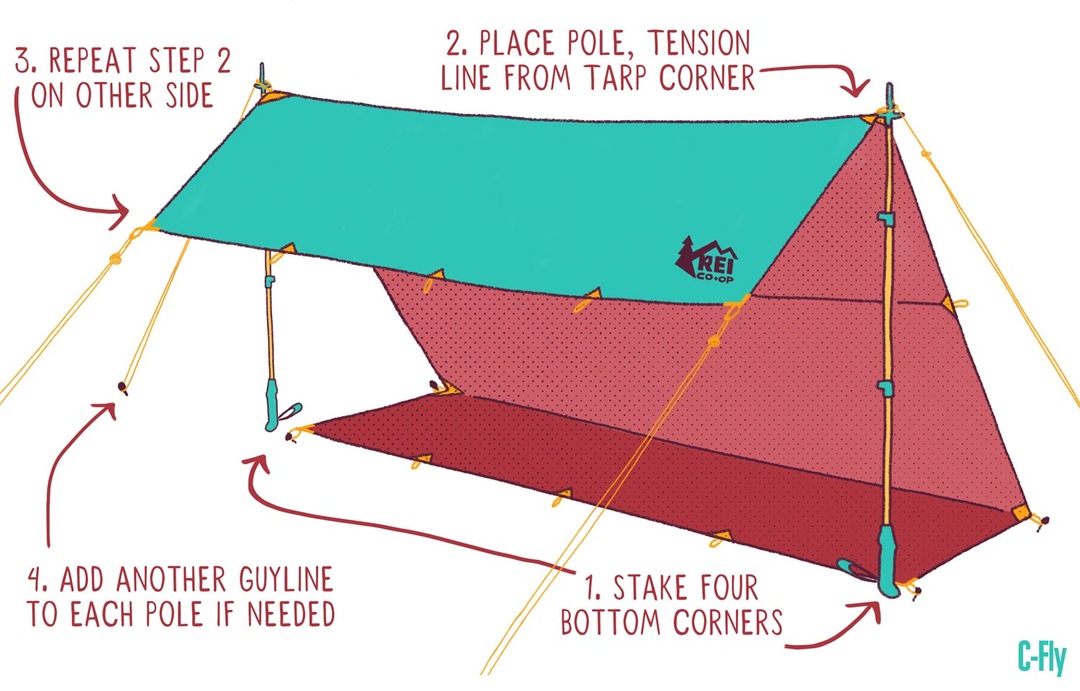
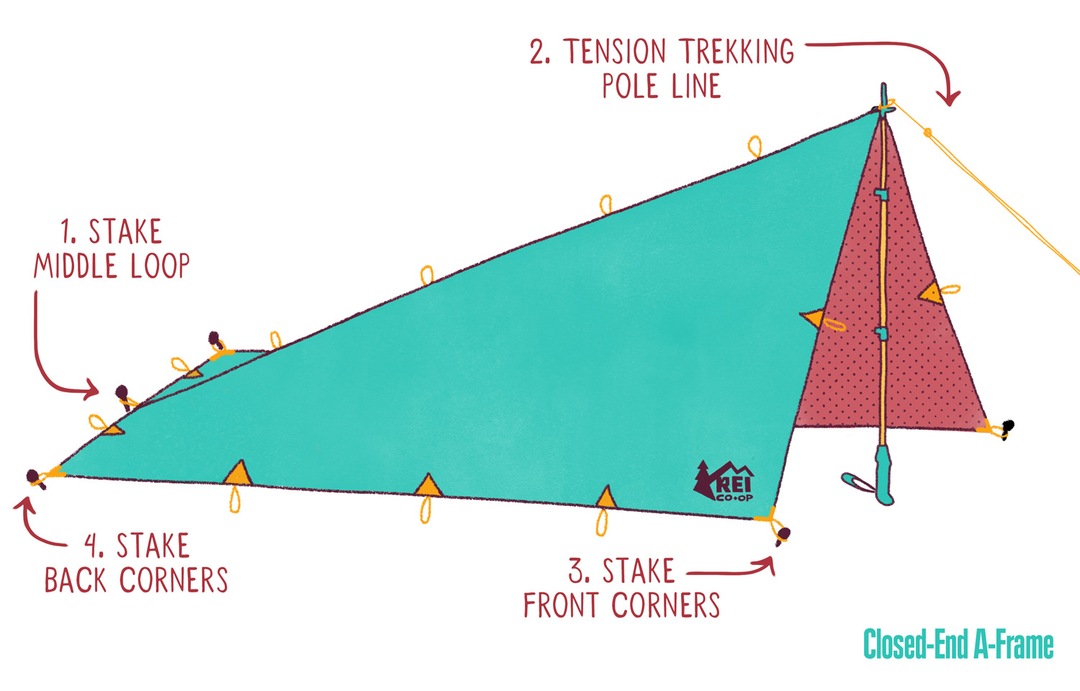
Tarp Shelters
Click to see content:
Gear Lists
Click to see content:
Critical summer gear
Critical winter gear
Gear for Expedition paddling
Gear for pool sessions
Optional -
Wear Earplugs against Surfer’s Ear
Outfitting
Mounting Go-Pro for observing your technique
Key Points
- Glue
- Drill Small
- Countersink hole
- Screw throw into something
- Add sealing adhesive to inside securing object
Paddle Indexing - mainly on round shafted paddles
Duct tape on paddle for protection / emergencies
Hockey tape on paddle shaft to improve grip with gloves
Fluoro tape on paddle for visibility
Write your name on your gear
Making a skirt strap easier to grab - using hosing and tape
Put rubber/tape on edges of bulkhead to distribute load on boat plastic
Drysuit Care
Auto - Carrying passengers
Auto - Carrying boats
Carrying hardware
Carrying climbing nuts on carabiner
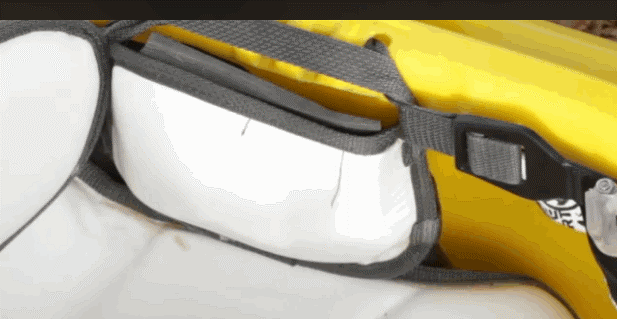
Trick for securing hip pads higher
Maintenance
- clean sand out of boat regularly
- put foam or other load spreading material around foot bulkhead to avoid deformation / spread deformation
- regularly tighten screws on boat to avoid tearout
- use plastic washers between washers and boat material to reduce creep
Sourcing Foam for Outfitting
Gluing Minicell Foam In Boat
Cutting Foam To Shape
Hull Repair
Repairing Neoprene Leaks
Expedition
Click to see content:
Shelters


 Hammock Shelter

Improvised Sailing

My Gear
Click to see content:
Germany
Boats
Accessories
Rescue
US
Boats
Accessories
Rescue
Currently missing
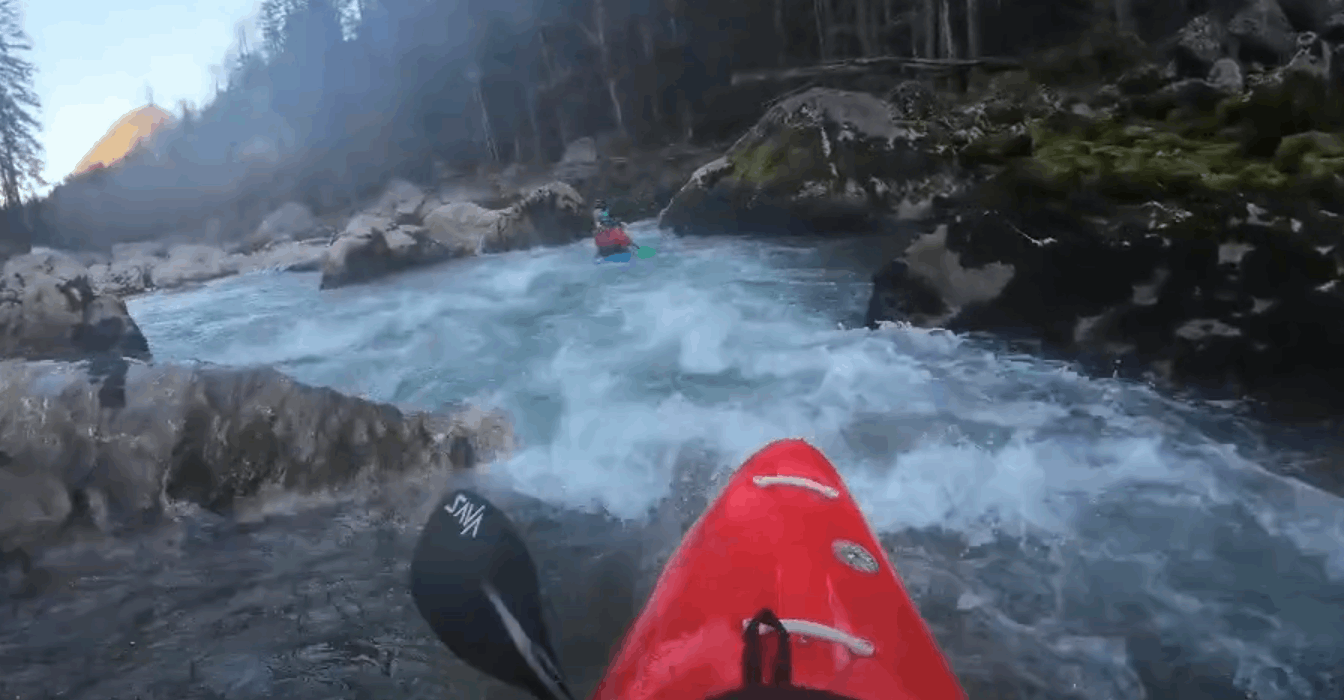
Tours
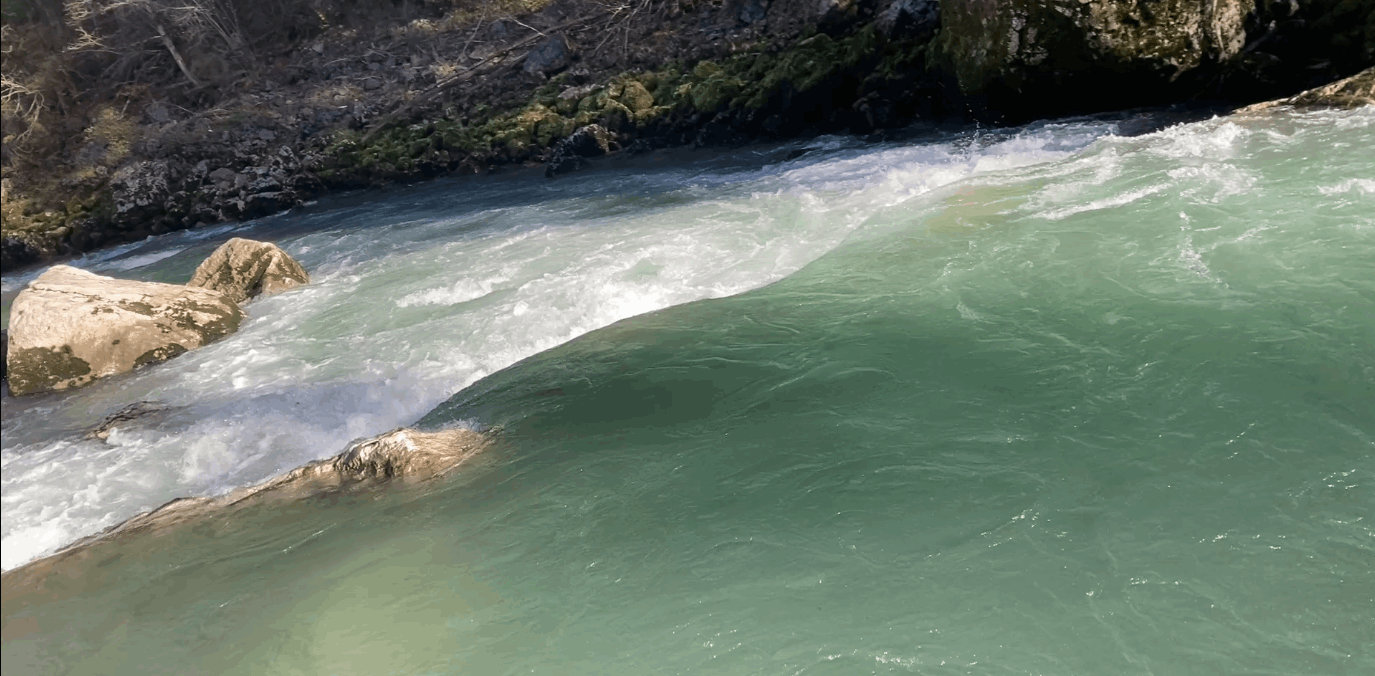
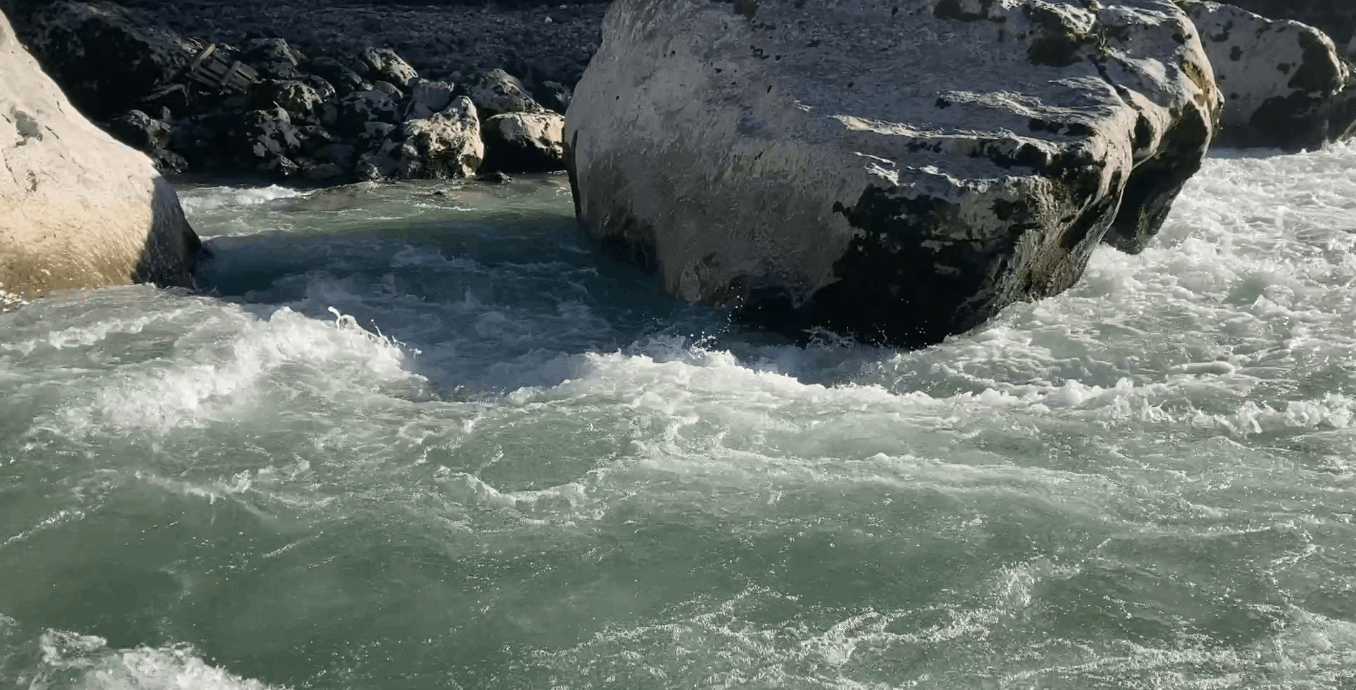
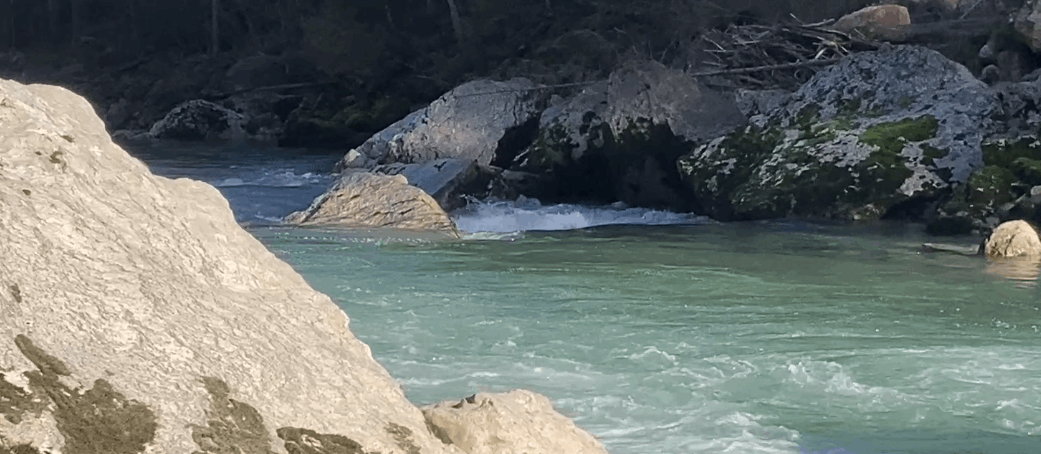
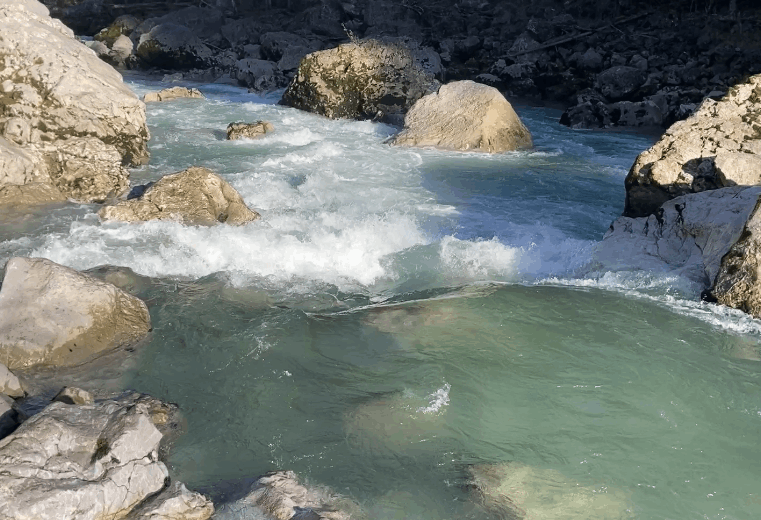
Stay far right
Depending on water level - Give rock at landing some room
Low water - Land and carve right
Stay right through the wave then cut left
Soca season: 15 March to 31 October from 9:00 to 18:00. Camping spots Links:Click to see content:
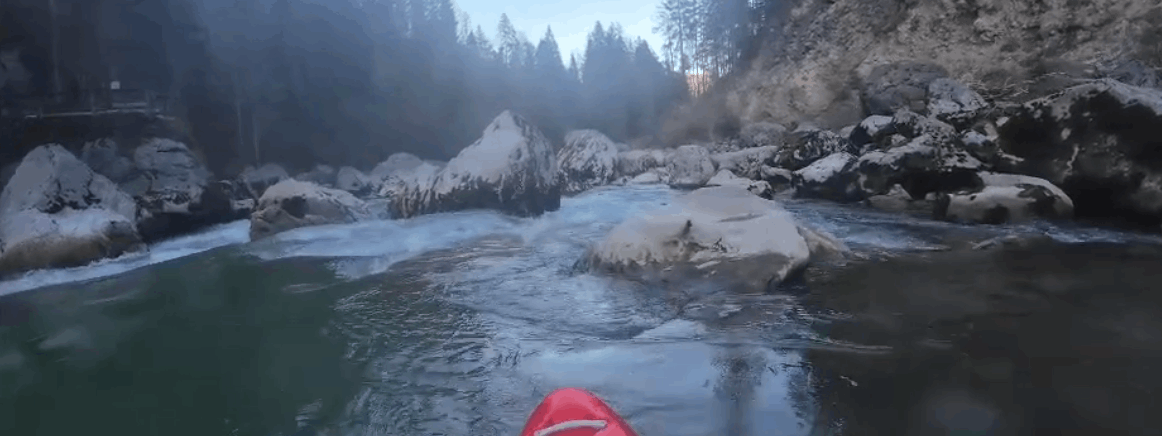
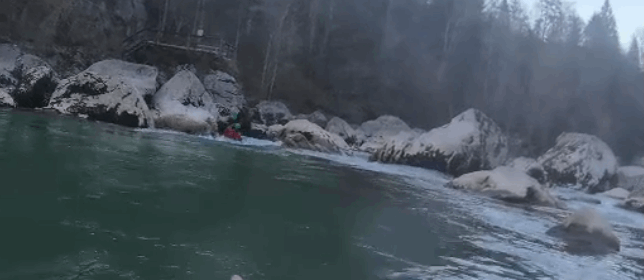
Whitewater I’ve Paddled
Click to see content:
North America
Europe
Tour Breakdowns or Info
Click to see content:
Lofere Teufelschlucht (ohne Dreierkombi)
Click to see content:
1 - Entrance after “Dreierkombi”
2 - Small wave
3 - Small drop
4 - Small slalom
5 - Bumpy turn
6 - Slot
7 - Slalom

9 - Slot or slalom, bumpy turn
 Right - Bumpy turn - cross river, then cut to inside of rock - be prepare for sidewards boof
10
11 - Double bump drop
12 - Bumpy Slalom on far right

13 - Small wave, then a narrows
14
Soca
Click to see content:
References
Click to see content:
Books
Youtube
Facebook
Podcasts